Point Cloud Classification - Part 1: Basic Classification
< Previous section Next section >
Goal
In this section of the tutorial you will learn how to go from a raw, unclassified point cloud to a fully classified point cloud (ground, low/medium/high vegetation, buildings)!
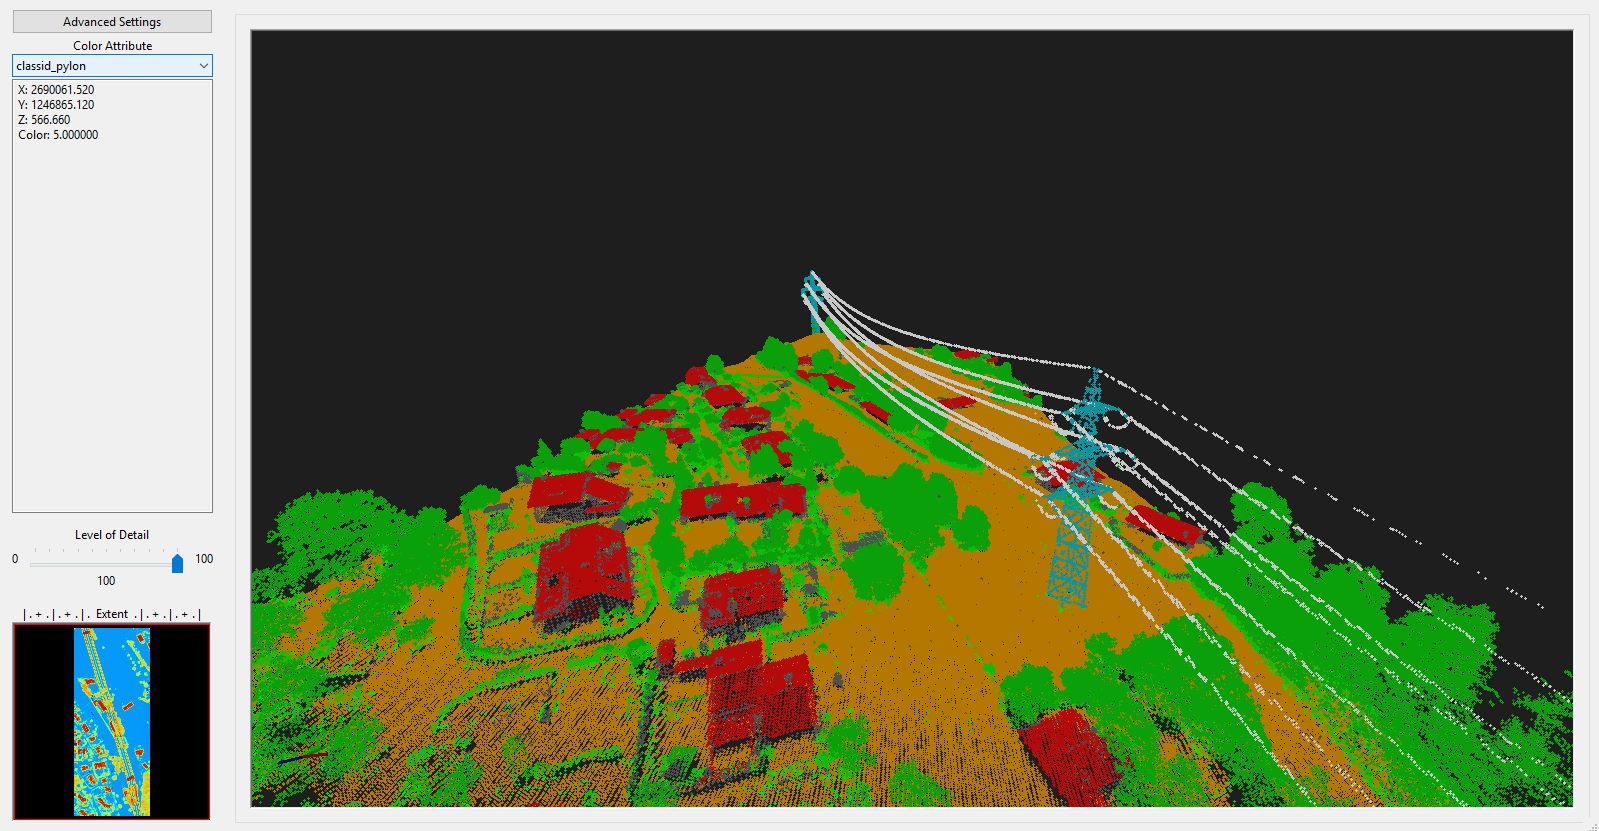
The powerline and pylon classification, which you can already see in the screenshot, will be covered in part 2. So even if your main goal is powerline and pylon classificiation, do not skip this section as part 2 builds on the results from part 1!
Tutorial Structure
- Query the point cloud from the virtual point cloud dataset
- Filter noise points
- Perform ground classification
- Segment planar objects for building roof detection
- Perform building and vegetation classification
- Clean building facades
- Clean building roofs
Locate the Data and Folders from the Previous Section
Take care that you have finished the previous tutorial section! In this tutorial we will need the prepared folders and files.
To start, first open LIS Pro 3D!
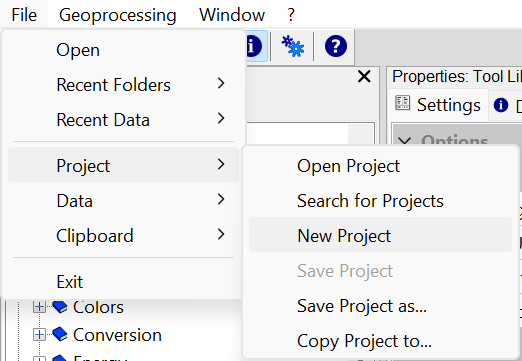
Create a New Project
If you have any data open in LIS Pro 3D, open a new, clean project!
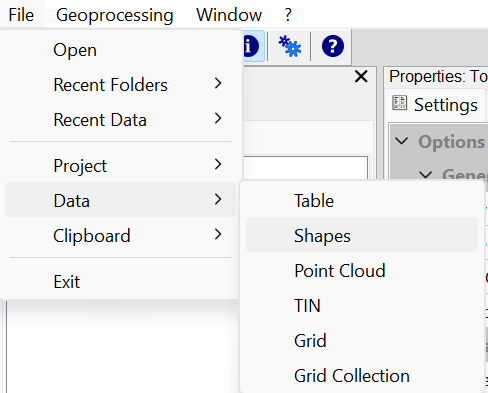
Open Tiles_500.shp (single_tile_graticule.shp)
Use the upper-left menu in order to load the Tiles_500.shp file. Please note that this is the same as the single_tile_graticule.shp created previously, so you can also use this file instead!
Get Subset from your Point Cloud Catalog
We can use Tiles_500.shp in order to query an area of interest from our available datasets. The typical scenario is the extraction of a subset.
In our case, the tile size is larger than the “physical” tiling. Thus, the two available *.laz.files will be merged into a single point cloud.
Open the Get Subset from Virtual LAS/LAZ Tool
- Provide the tiles.lasvf file that we have created in the previous tutorial
- Provide the Tiles_500.shp for the spatial query!
- use the settings shown here:
Tool: Get Subset from Virtual LAS/LAZ
Geoprocessing: LIS Pro 3D → Virtual → LAS/LAZ // Tools → LIS Pro 3D → Virtual
| Parameter | Setting |
|---|---|
| Filename | …/data/las/tiles.lasvf |
| Optional Output Filepath | |
| Copy existing Attributes | 🗹 |
| Classes | |
| Last Returns | ☐ |
| Constrain Query | ☐ |
| File Compression | 🗹 |
| Fail on Empty Point Clouds | 🗹 |
| Point Cloud Thinning | 🗹 |
| Point Spacing | 0.1 |
| AOI | |
| > Shape | Tiles_500 |
| Tilename | <not set> |
| Grid system | <not set> |
| > Grid | <not set> |
| X-Extent | 0;0 |
| Y-Extent | 0;0 |
| Add Overlap | 🗹 |
| Overlap | 30 |
| Skip Empty AOIs | 🗹 |
| Optional Tile Info Filename | |
| One Point Cloud per Polygon | ☐ |
Use the Save button before execution of the tool in order to save the parameters in an *.sg-parameters-file. Provide a reasonable name. If you have an sg-parameter-file for a specific tool, you can simply load your settings by using the Load button. Thereby, you don’t have to remember the settings. Do this for all the tools you run!
- Click Execute!
Inspect the Extracted Point Cloud Data
Find the extracted dataset in the PointCloud section of the Data Tab.
In the Description Tab you can see, that 1361643 points have been extracted from the point cloud catalog
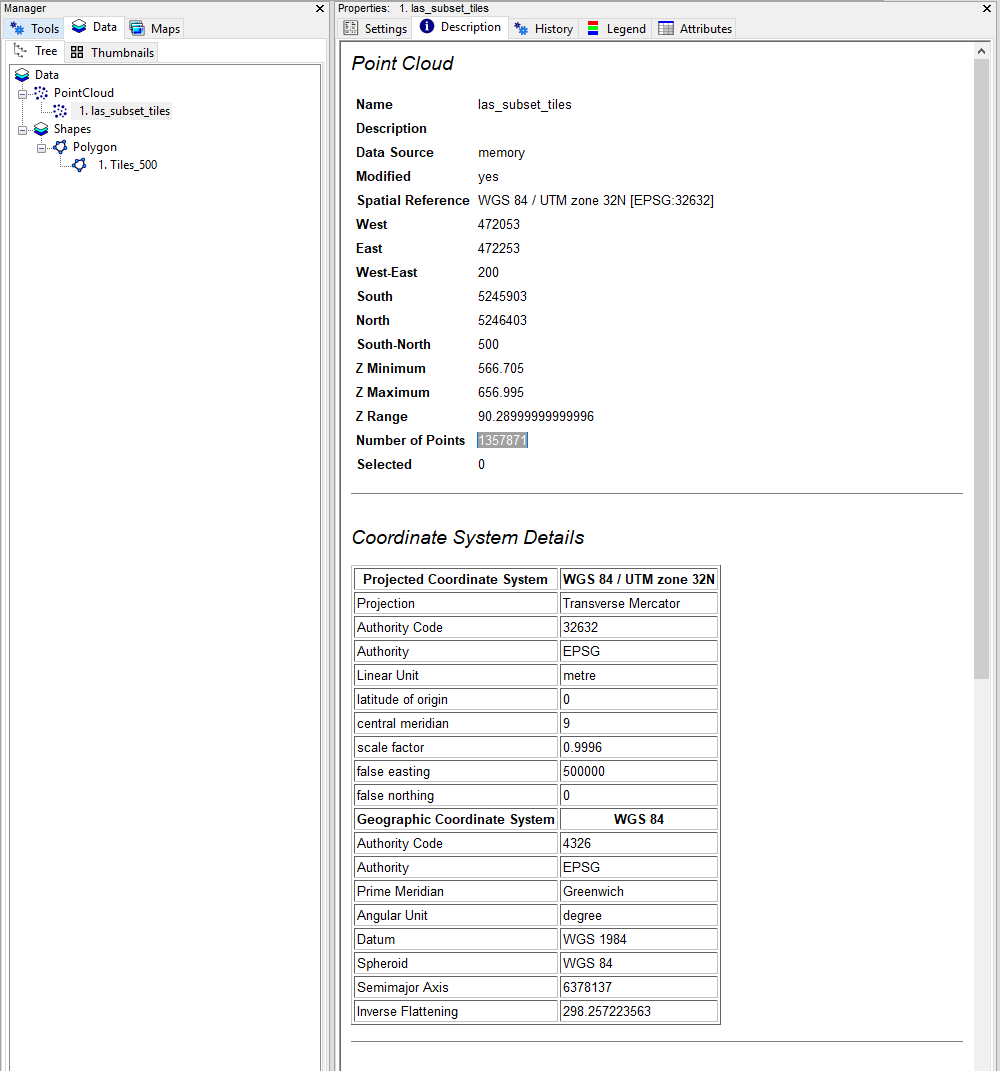
Open the las_subset_tiles dataset in a map by double-clicking on it!
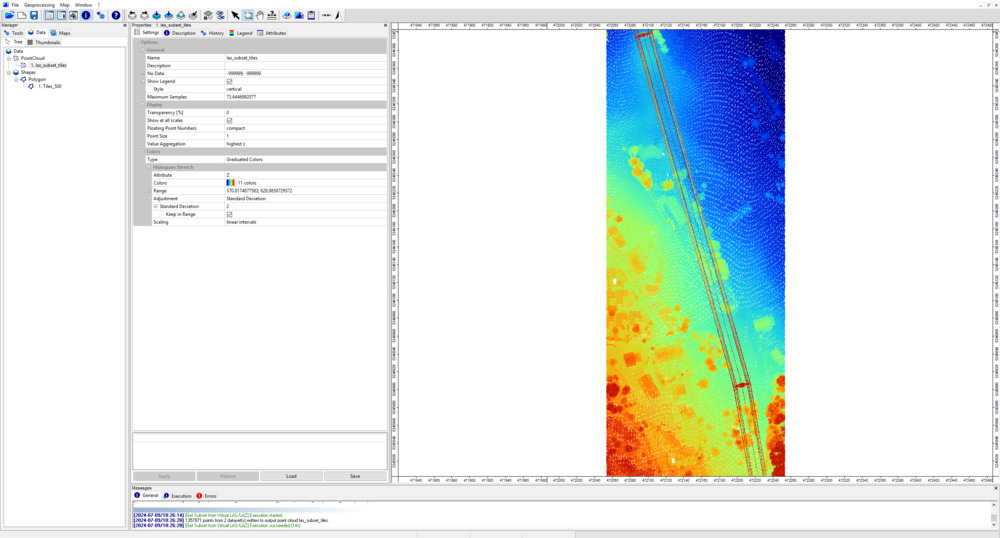
You can see that both “physical” point cloud files are merged together into one dataset here.
View the dataset also in the LIS Pro 3D > Point Cloud Editor > Point Cloud Editor.
Remove Noise Points
Open the tool LIS Pro 3D > Filtering > Remove Isolated Points
- Provide the las_subset_tiles dataset.
- use the following settings:
Tool: Remove Isolated Points
Geoprocessing: LIS Pro 3D → Filtering → Point Cloud // Tools → LIS Pro 3D → Filtering
| Parameter | Setting |
|---|---|
| >> Point Cloud | las_subset_tiles |
| Copy existing Attributes | 🗹 |
| > Neighborhood Point Cloud | <not set> |
| < Filtered Point Cloud | <not set> |
| Search Radius | 3 |
| Maximum Number of Points | 2 |
| Method | label points |
| Attribute Name | noise |
| Class ID Noise | 7 |
| Class ID Undefined | 1 |
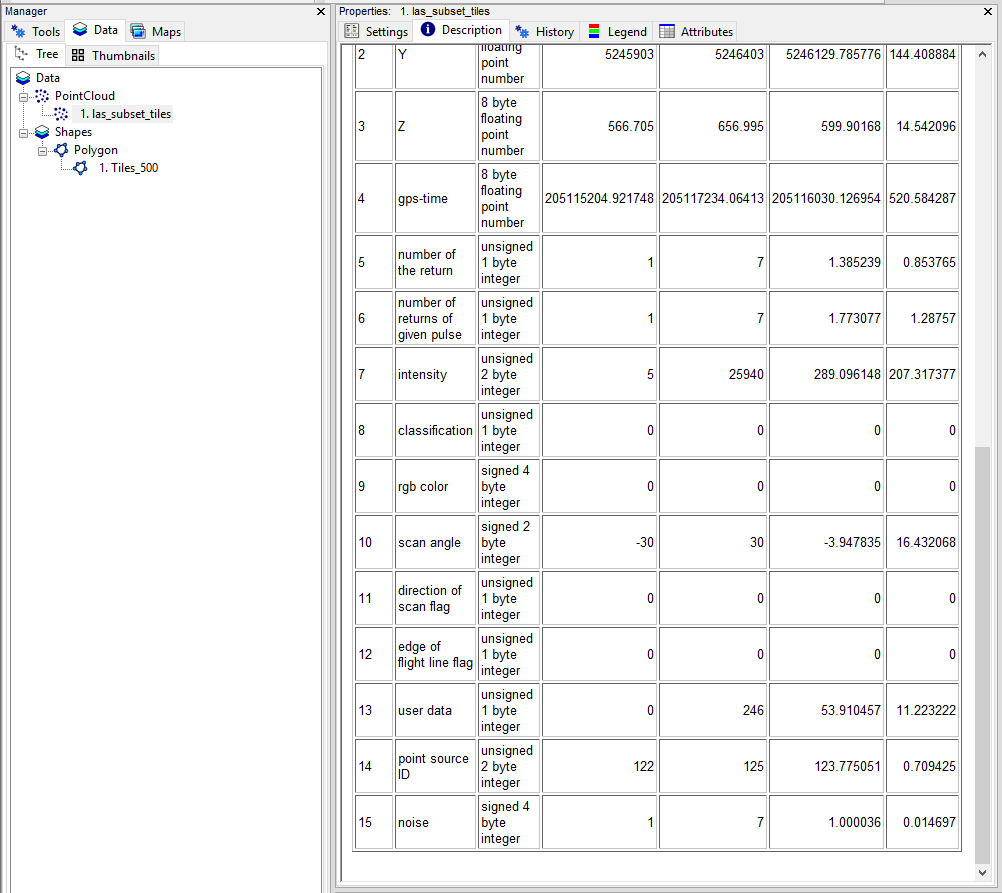
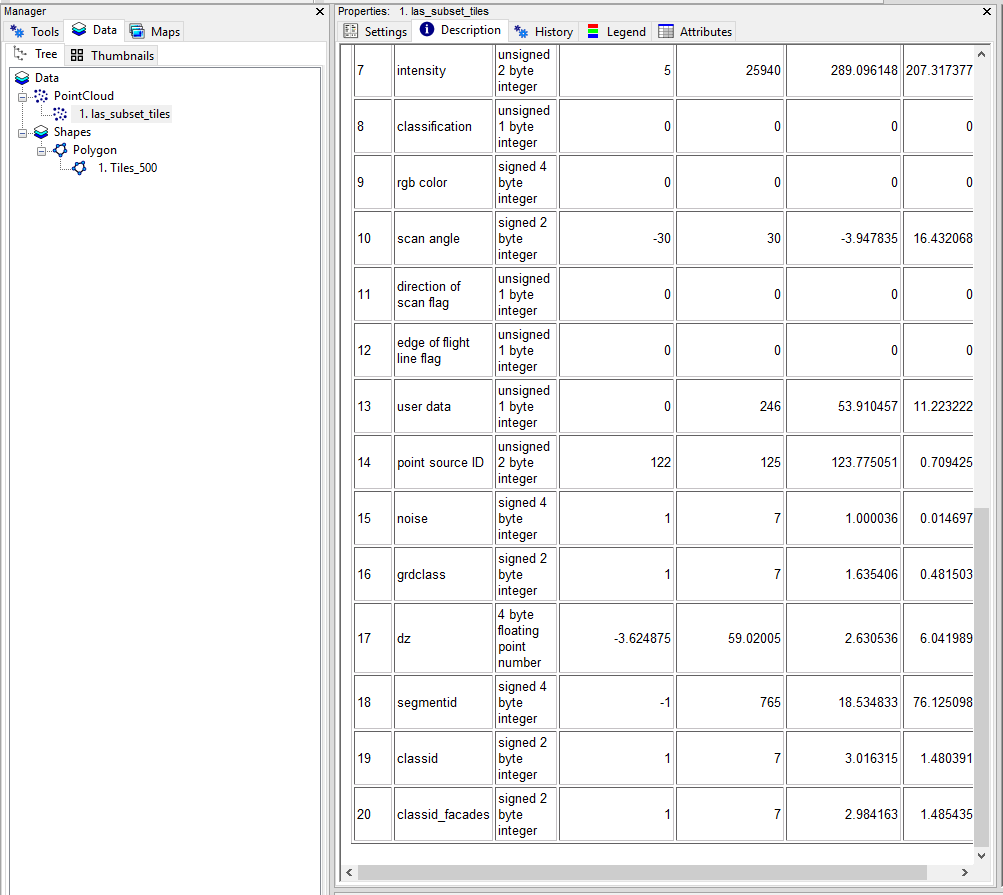
After Execution we can see that the point cloud has got an additional attribute field called noise, indicating, valid and invalid points for the next processing steps.
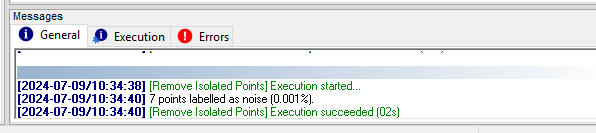
The Messages Window indicates that only 7 points have been labelled as noise
Keep in mind that in a typical raw data scenario a much higher number of noise points must be expected (including low and high outliers). These outliers have to be labelled before the following processing steps.
Ground Classification
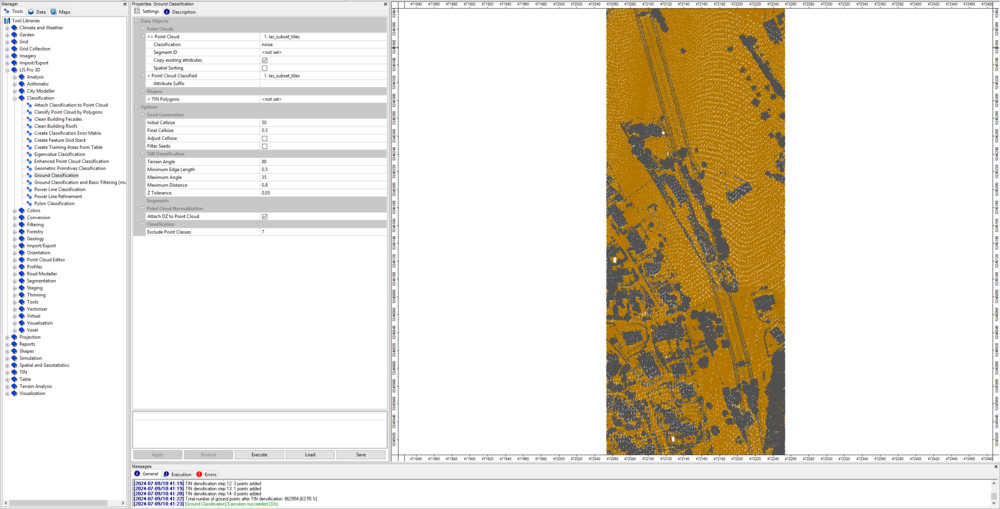
Open the tool LIS Pro 3D > Classification > Ground Classification
- Provide the las_subset_tiles dataset.
- Provide the noise attribute from the previous step.
- Exclude Point Classes: 7 (computed in the previous step)
- use the following settings:
Tool: Ground Classification
Geoprocessing: LIS Pro 3D → Classification // Tools → LIS Pro 3D → Classification
| Parameter | Setting |
|---|---|
| >> Point Cloud | las_subset_tiles |
| Classification | noise |
| Segment ID | <not set> |
| Copy existing attributes | 🗹 |
| Spatial Sorting | ☐ |
| < Point Cloud Classified | <not set> |
| Attribute Suffix | |
| < TIN Polygons | <not set> |
| Seed Generation | |
| Initial Cellsize | 50 |
| Final Cellsize | 0.5 |
| Adjust Cellsize | ☐ |
| Filter Seeds | ☐ |
| TIN Densification | |
| Terrain Angle | 88 |
| Minimum Edge Length | 0.5 |
| Maximum Angle | 35 |
| Maximum Distance | 0.8 |
| Z Tolerance | 0.05 |
| Segments | |
| Point Cloud Normalization | |
| Attach DZ to Point Cloud | 🗹 |
| Classification | |
| Exclude Point Classes | 7 |
- Click Execute
After Execution, the map view will be updated and we can see the point cloud classified into ground and non-ground points.
View the updated dataset also in the LIS Pro 3D > Point Cloud Editor > Point Cloud Editor. Provide the grd_class as Classification and use the shortcut 5 in order to show the classification.
Segmentation of Planar Objects for Building Roof Detection
Open the tool LIS Pro 3D > Segmentation > Segmentation by Plane Growing
- Provide the las_subset_tiles dataset.
- Provide the grd_class attribute from the previous step as Filter Attribute.
Use the following settings:
Tool: Segmentation by Plane Growing
Geoprocessing: LIS Pro 3D → Segmentation // Tools → LIS Pro 3D → Segmentation
| Parameter | Setting |
|---|---|
| >> Point Cloud | las_subset_tiles |
| Seed Attribute | <not set> |
| Threshold Attribute | <not set> |
| Filter Attribute | grdclass |
| Direction Scanner (X) | <not set> |
| Copy existing attributes | 🗹 |
| < Point Cloud Segmented | <not set> |
| Attribute Suffix | |
| Filtering | |
| Low Range | 0;1 |
| High Range | 3;64 |
| NN Search | |
| Method NN | radius |
| Search Radius | 1 |
| Minimum Number of Neighbors | 3 |
| Segmentation | |
| Robust Plane Fitting | 🗹 |
| Maximum Distance | 0.1 |
| Minimum Percentage | 50 |
| Method Search Point | search point must be included in best fit plane |
| Random Seed | 2 |
| Growing Radius | 1 |
| Growing Plane Distance | 0.1 |
| Relabel all Points | ☐ |
| Segmentation Iterations | 1 |
| Region Growing | |
| Search Radius | 1 |
| Minimum Segment Size | 20 |
| Maximum Segment Size | 100000 |
| Maximum Normal Difference | 10 |
| Maximum Plane Offset | 0.2 |
| Normal Recalculation Interval | 100000 |
| Output | |
| Segment Size | ☐ |
| Normal Vector | ☐ |
| Slope | ☐ |
| Aspect | ☐ |
| Quality of fit | ☐ |
- Click Execute
After Execution, the map view has been updated and we can see the segmented planar objects in the analysed scene. The ground points have been ignored in this segmentation.
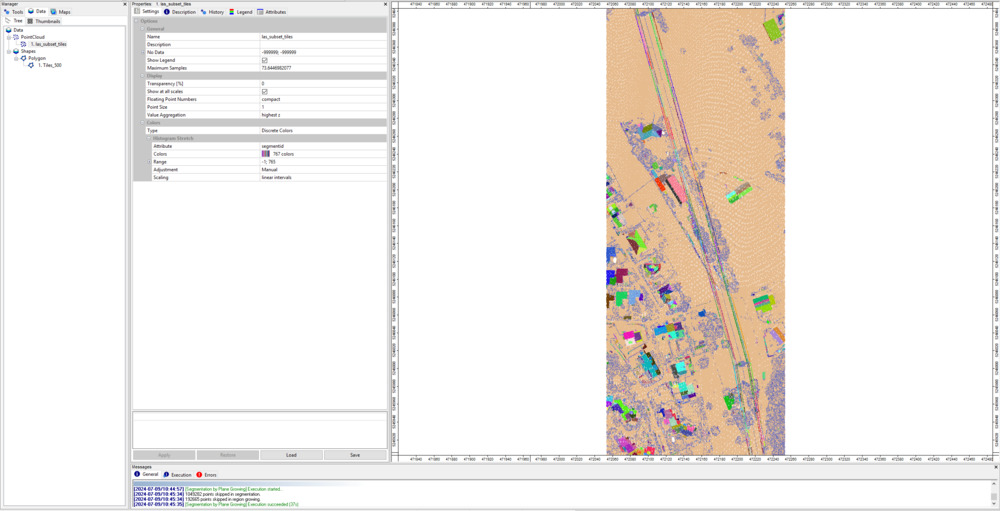
View the updated dataset also in the LIS Pro 3D > Point Cloud Editor > Point Cloud Editor. Provide the segmentid as Random and use the shortcut Q in order to show the segment IDs.
Building and Vegetation Classification
Open the tool Enhanced Point Cloud Classification
- Provide the las_subset_tiles dataset.
- Provide the segmentid attribute from the previous step.
- Provide the grd_class attribute from ground classification.
- Provide the dz attribute from ground classification.
Use the following settings:
Tool: Enhanced Point Cloud Classification
Geoprocessing: LIS Pro 3D → Classification // Tools → LIS Pro 3D → Classification
| Parameter | Setting |
|---|---|
| >> Point Cloud | las_subset_tiles |
| Segment ID | segmentid |
| Class ID Ground | grdclass |
| DZ | dz |
| Copy existing attributes | 🗹 |
| < Point Cloud Classified | <not set> |
| Attribute Suffix | |
| Exclude Point Classes | 7 |
| Buildings | |
| Method | point cloud features |
| Minimum DZ | 2 |
| Growing Radius | 1 |
| Feature Radius | 1 |
| Minimum Neighbor Ratio | 60 |
| Slope-Adaptive | ☐ |
| Mininum Points Building | 200 |
| Vegetation | |
| Search Radius | 2 |
| Minimum Points Vegetation | 5 |
| Minimum DZ Low Vegetation | 0 |
| Minimum DZ Medium Vegetation | 0.3 |
| Minimum DZ High Vegetation | 2 |
| Calibration Information | |
| Output Calibration Information | ☐ |
- Click Execute
After execution the map view has been be updated

View the updated dataset also in the LIS Pro 3D > Point Cloud Editor > Point Cloud Editor. Provide the classid as Classification and use the shortcut 5 in order to show the classification.
This classification has still some errors: vegetation points on the facades of the buildings and vegetation points on small roof structures like chimneys. To overcome this, we run two additional cleaning steps.
Clean Building Facades
Open the tool LIS Pro 3D > Classification > Clean Building Facades
- Provide the las_subset_tiles dataset.
- Provide the classid attribute from the previous step as Attribute to Filter.
- Set the Attribute Suffix for the output attribute to facades.
Use the following settings:
Tool: Clean Building Facades
Geoprocessing: LIS Pro 3D → Classification // Tools → LIS Pro 3D → Classification
| Parameter | Setting |
|---|---|
| >> Point Cloud | las_subset_tiles |
| Attribute to Filter | classid |
| DZ Ground | <not set> |
| Copy existing attributes | 🗹 |
| < Point Cloud Filtered | <not set> |
| Attribute Suffix | facades |
| Filter | |
| Search Radius | 1 |
| Building Class(es) | 6;6 |
| Low Attribute Range | 3;5 |
| High Attribute Range | 7;64 |
| Target Class | 1 |
- Click Execute
After execution a new attribute classid_facades has been added to the attributes table of the point cloud.
Clean Building Roofs
Open the tool LIS Pro 3D > Classification > Clean Building Roofs
- Provide the las_subset_tiles dataset.
- Provide the classid_facades attribute from the previous step as Attribute to Filter.
- Set the Attribute Suffix for the output attribute to roofs.
Use the following settings:
Tool: Clean Building Roofs
Geoprocessing: LIS Pro 3D → Classification // Tools → LIS Pro 3D → Classification
| Parameter | Setting |
|---|---|
| >> Point Cloud | las_subset_tiles |
| Attribute to Filter | classid_facades |
| Copy existing attributes | 🗹 |
| < Point Cloud Filtered | <not set> |
| Attribute Suffix | roofs |
| NN Search | |
| Dimension | 3D search |
| Search Radius | 2.5 |
| Use Inner Radius | ☐ |
| Filter | |
| Threshold Majority | 25 |
| Target Class | 1 |
| Filter Facade Class | ☐ |
- Click Execute
After execution a new attribute classid_facades_roofs has been added to the attributes table of the point cloud.
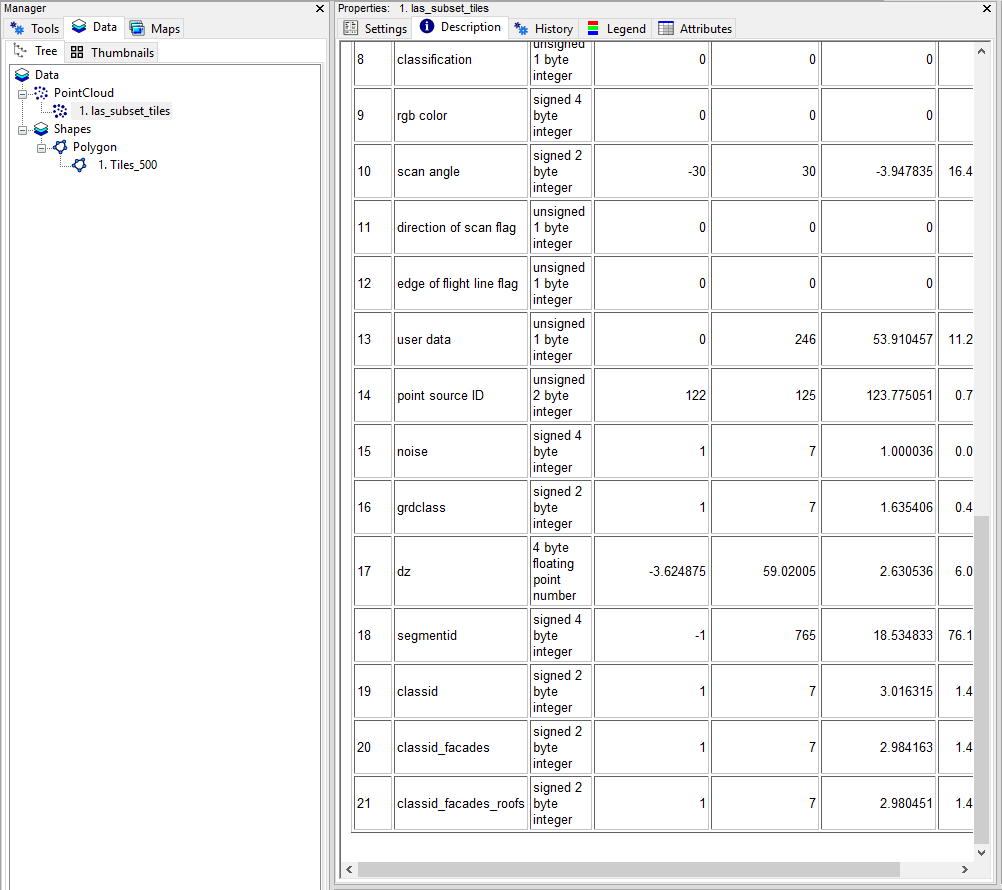
Comparing the initial classid with the classid_facades_roofs shows that vegetation points on facades and roofs have been relabeled to the undefined class (1):
classid (not cleaned) 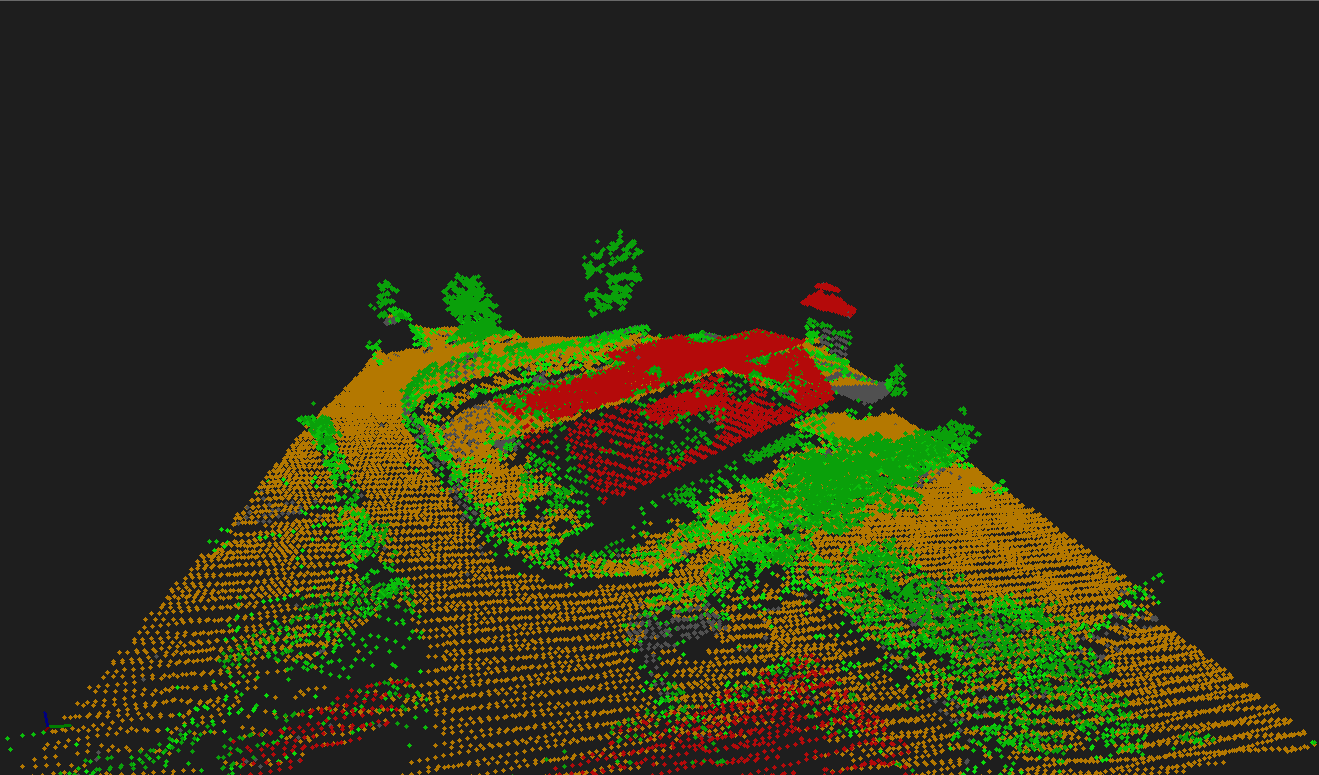
classid_facades_roofs (cleaned) 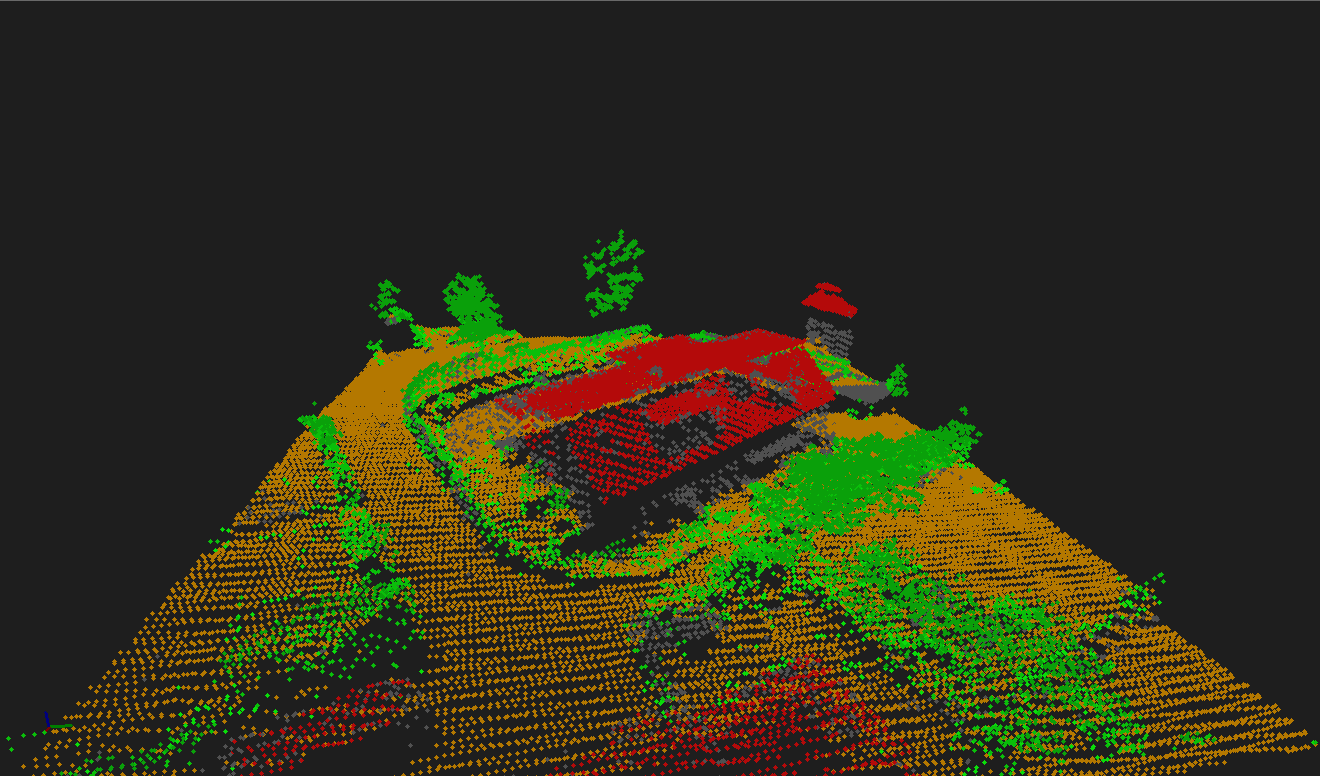
Now we are done with the basic point cloud classification!
Recap
In this section (part 1 of the point classification tutorial) we have classified an ALS point cloud into the classes ground, building, vegetation (low/medium/high) by executing the following steps:
- Query the point cloud from the virtual point cloud dataset
- Filter noise points
- Perform ground classification
- Segment planar objects for building roof detection
- Perform building and vegetation classification
- Clean building facades
- Clean building roofs
In the next section, you will learn how you can add the powerline and pylon classification which you can already see in the screenshot above!