Installation of LIS Pro 3D with Python
< Previous section Next section >
In this tutorial, you will learn how to install LIS Pro 3D and Python. This is the prerequisite for automated point cloud processing!
This tutorial describes the complete setup of LIS Pro 3D with Python-support and requires no prior knowledge of either software. Please note that the tutorial is tailored to describe the setup on a Windows-based system. However, the setup works similar on GNU/Linux-based systems.
Installation and Set Up of Environment
In this tutorial, we demonstrate a quick way to set up a fully featured Python environment for working with the SAGA GIS / LIS Pro 3D Python API.
If you already have experience with Python, you can skip steps that are not relevant to your existing setup and adapt the instructions to your own Python environment.
In the following we want to install
LIS Pro 3D with all its tool libraries
Microsoft Visual Studio Code (In order to create our Python code and run it)
Python extension for VSCode
Miniforge and Python (In order to have a convenient management of Python modules and no conflicts with other Python installations)
SAGA Python API, in order to have access to all SAGA and LIS Pro 3D Tools via Python
High-Level Overview
The following figure illustrates the overall system setup.
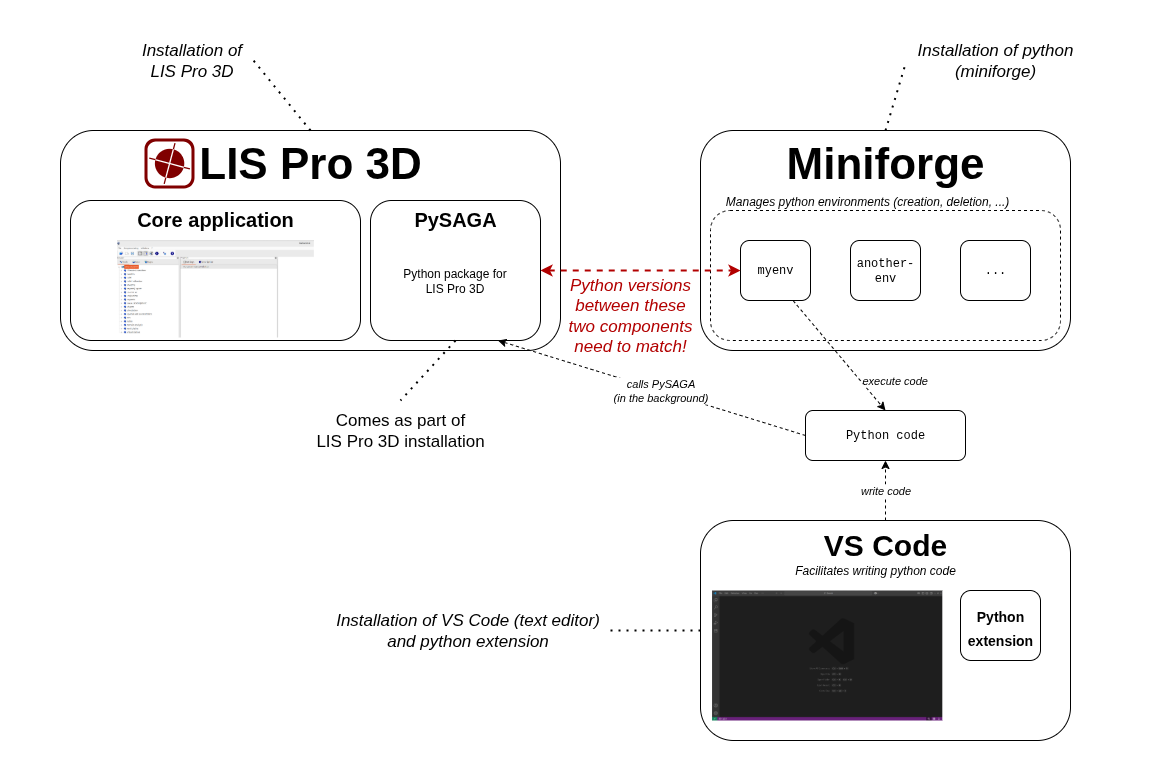
The exact steps for seamlessly integrating LIS Pro 3D with Python are described below!
Step 1: Install LIS Pro 3D
Use the provided file package in order to install LIS Pro 3D!
Step 1.1: Find the LIS Pro 3D Installation Files
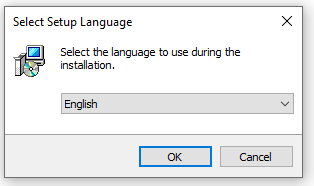
Find the LIS Pro 3D installation files and run executable!

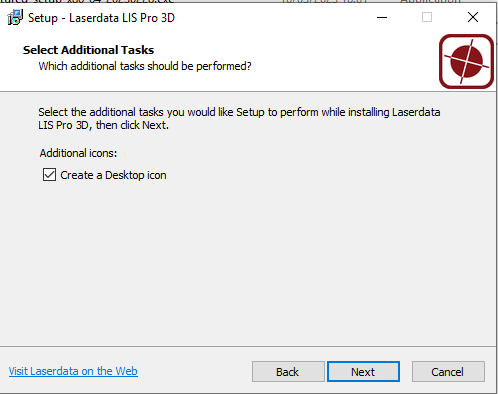
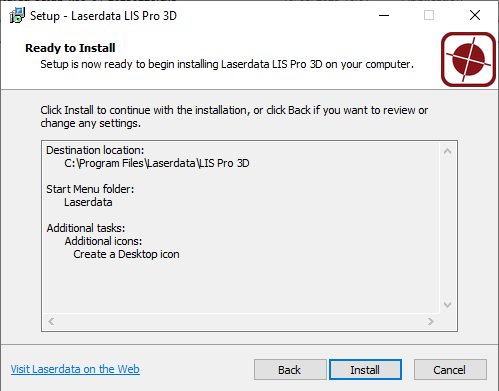
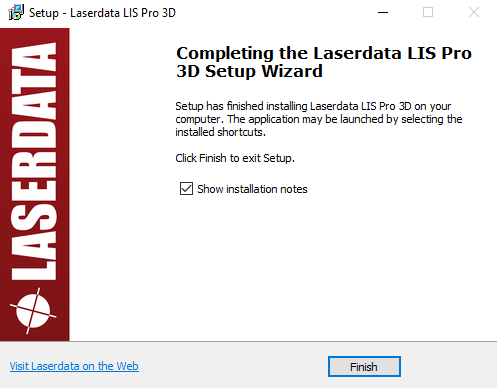
Step 1.2
Step 1.3
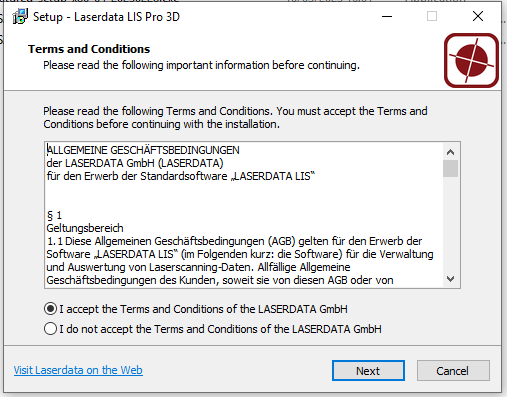
Step 1.4
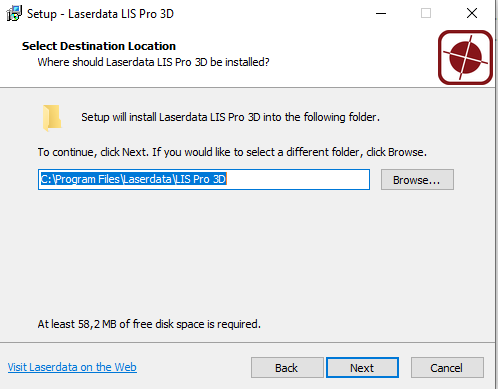
Step 1.5
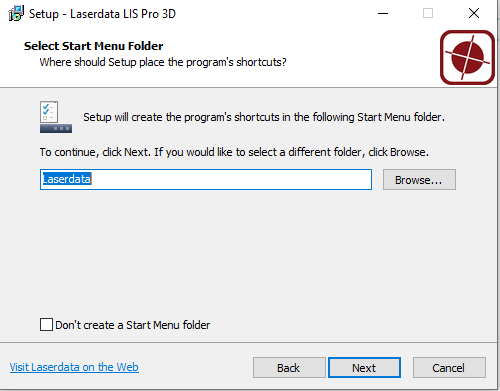
Step 1.6
Step 1.7
Step 1.8
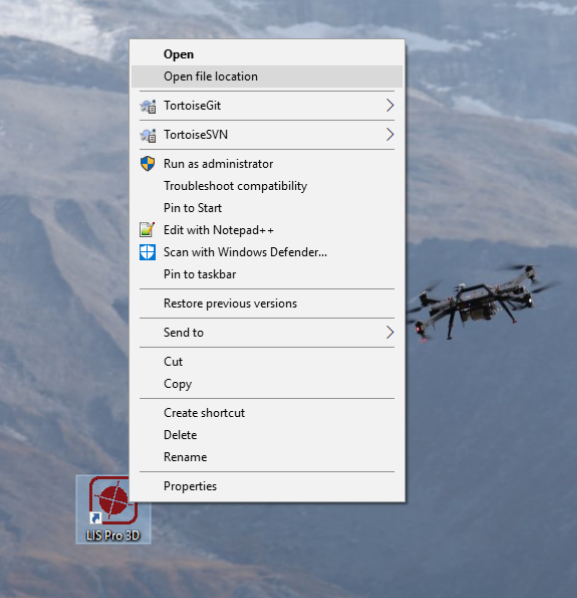
Step 1.9: Find File Location of your LIS Pro 3D Installation
Right Click onto the LIS Pro 3D Desktop Icon and select Open file location.
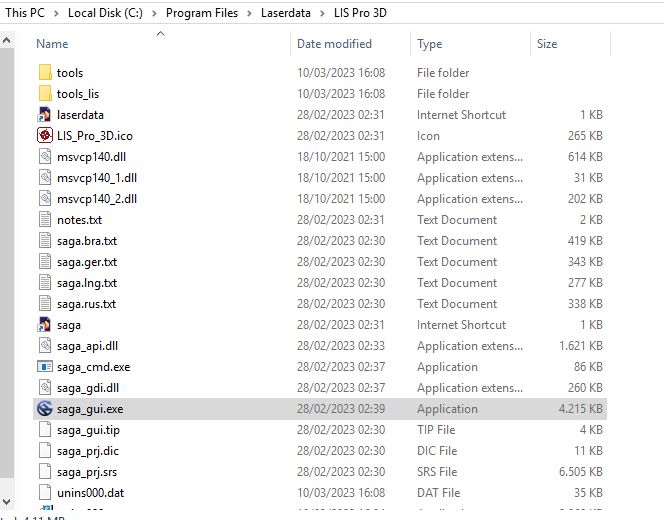
Step 1.10: Go to File Location of your LIS Pro 3D Installation
Here, you can find your installation location.
This path is relevant later for your Python scripts. Therefore the installation created the system environmental variable SAGA_PATH pointing on this location. This allows Python later to find the actual tool to run.
Step 2: Install Microsoft Visual Studio Code
Microsoft Visual Studio Code (VS Code) is a free source-code editor developed by Microsoft for Windows, Linux, and macOS. We will use it to edit our Python code. VS Code provides developers with a powerful and customizable development environment for building and debugging various types of applications. It is widely used by developers across different programming languages and frameworks.
VS Code has gained popularity among developers due to its lightweight nature, rich set of features, and wide support for various programming languages and frameworks. It has a thriving community that actively develops and maintains a wide range of extensions, making it a versatile and powerful tool for modern software development.
We will use it basically for writing our Python code, testing it and finally running it.
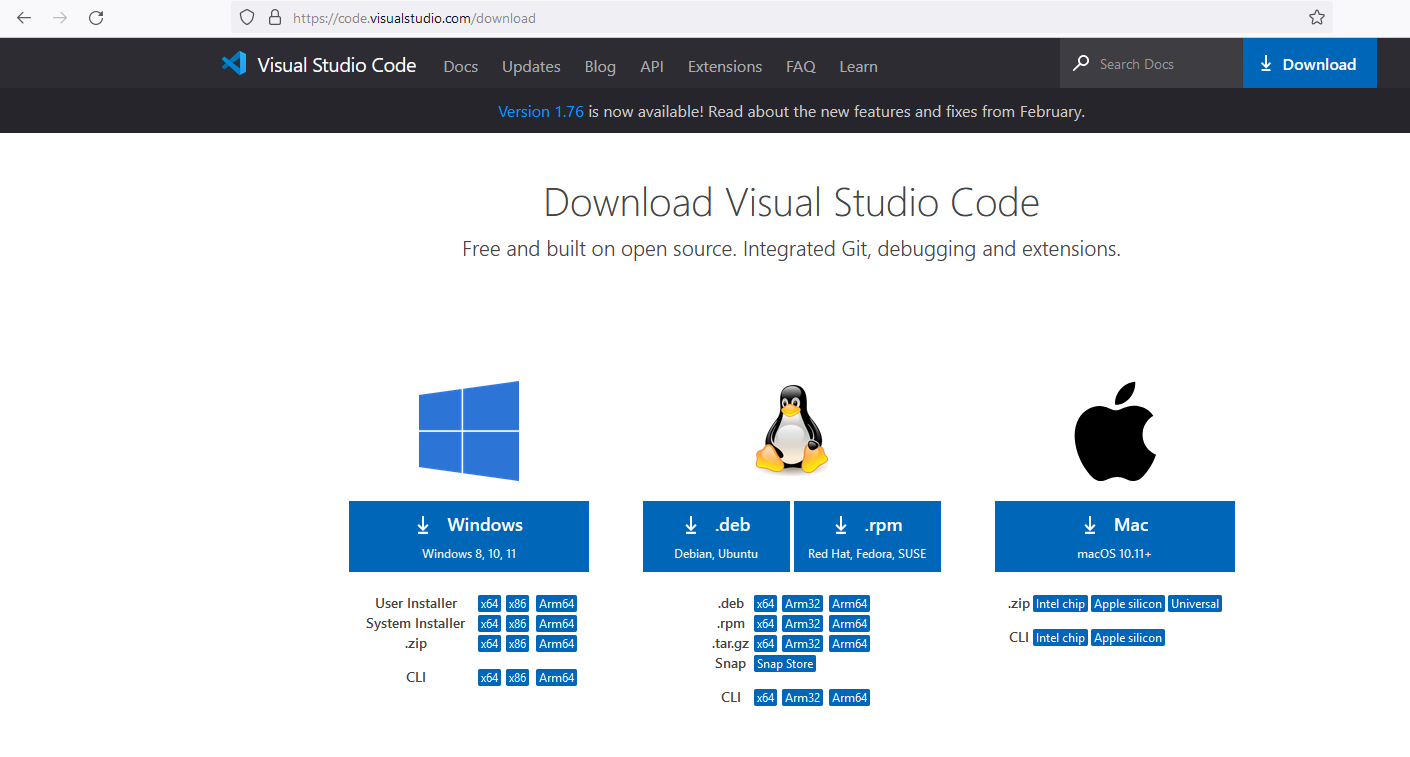
Go to: https://code.visualstudio.com/download and download the appropriate version of VSCode!
In our example: User Installer , x64
Execute Installer
Follow the installation wizard and accept the defaults!

Step 3: Install Python Extension for VSCode
We will install the VS Code Python extension, as it facilitates writing Python code: It allows VS Code to interpret our Python code, apply syntax highlighting for better readability and auto-completion for more convenient coding.
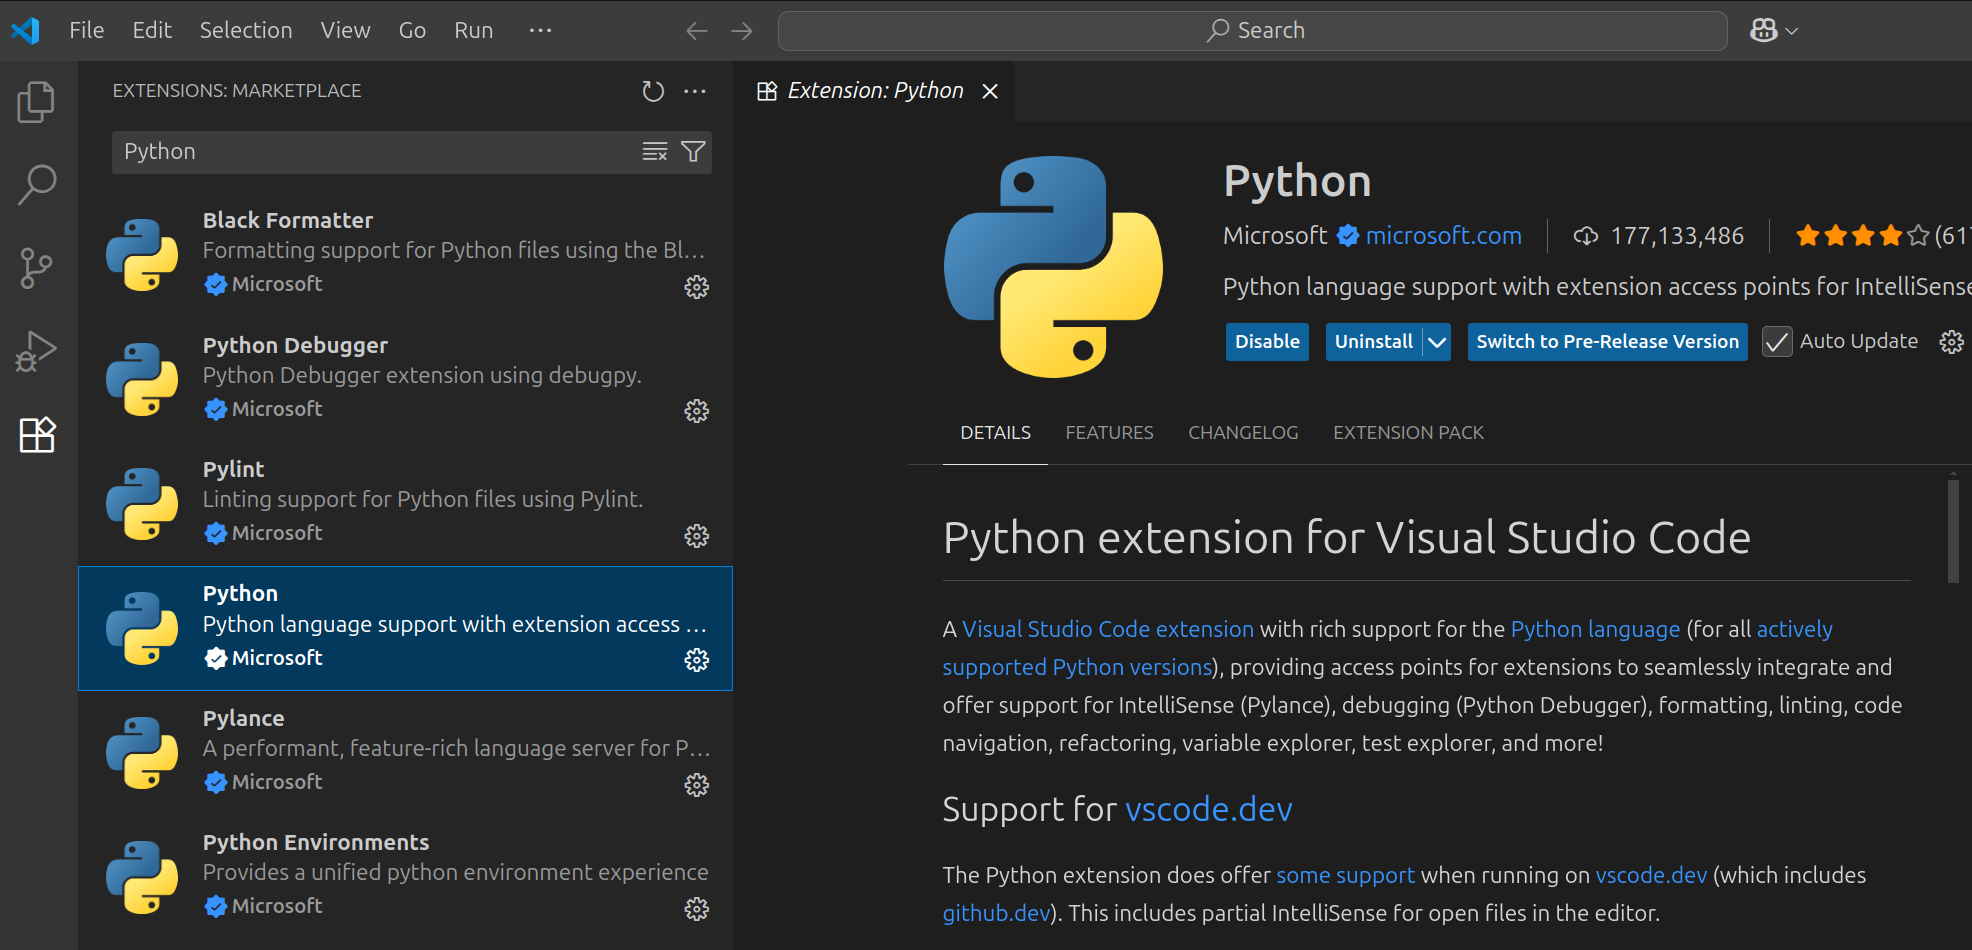
- Inside VS Code, click on the extensions icon in the left panel (the one with the four squares)
- In the search bar, type “Python” and click on the extension. Make sure to select the correct extension (named “Python” only and released by Microsoft)
- Click “Install” (in the screenshot below, the extension is already installed and therefore only offers the option to disable or uninstall)
Step 4: Install Miniforge
We use Python together with a package manager, which helps us managing our installed Python packages and avoids conflicts between different Python installations you might already have on your computer. This improves the usability.
The package manager we suggest here is conda as provided by the Miniforge installer. Miniforge provides a minimal installer for conda that includes only the essentials needed for conda to function. Conda is an open-source package management system and environment management system for installing multiple versions of software packages and their dependencies. It is commonly used for scientific computing, data processing, and machine learning projects.
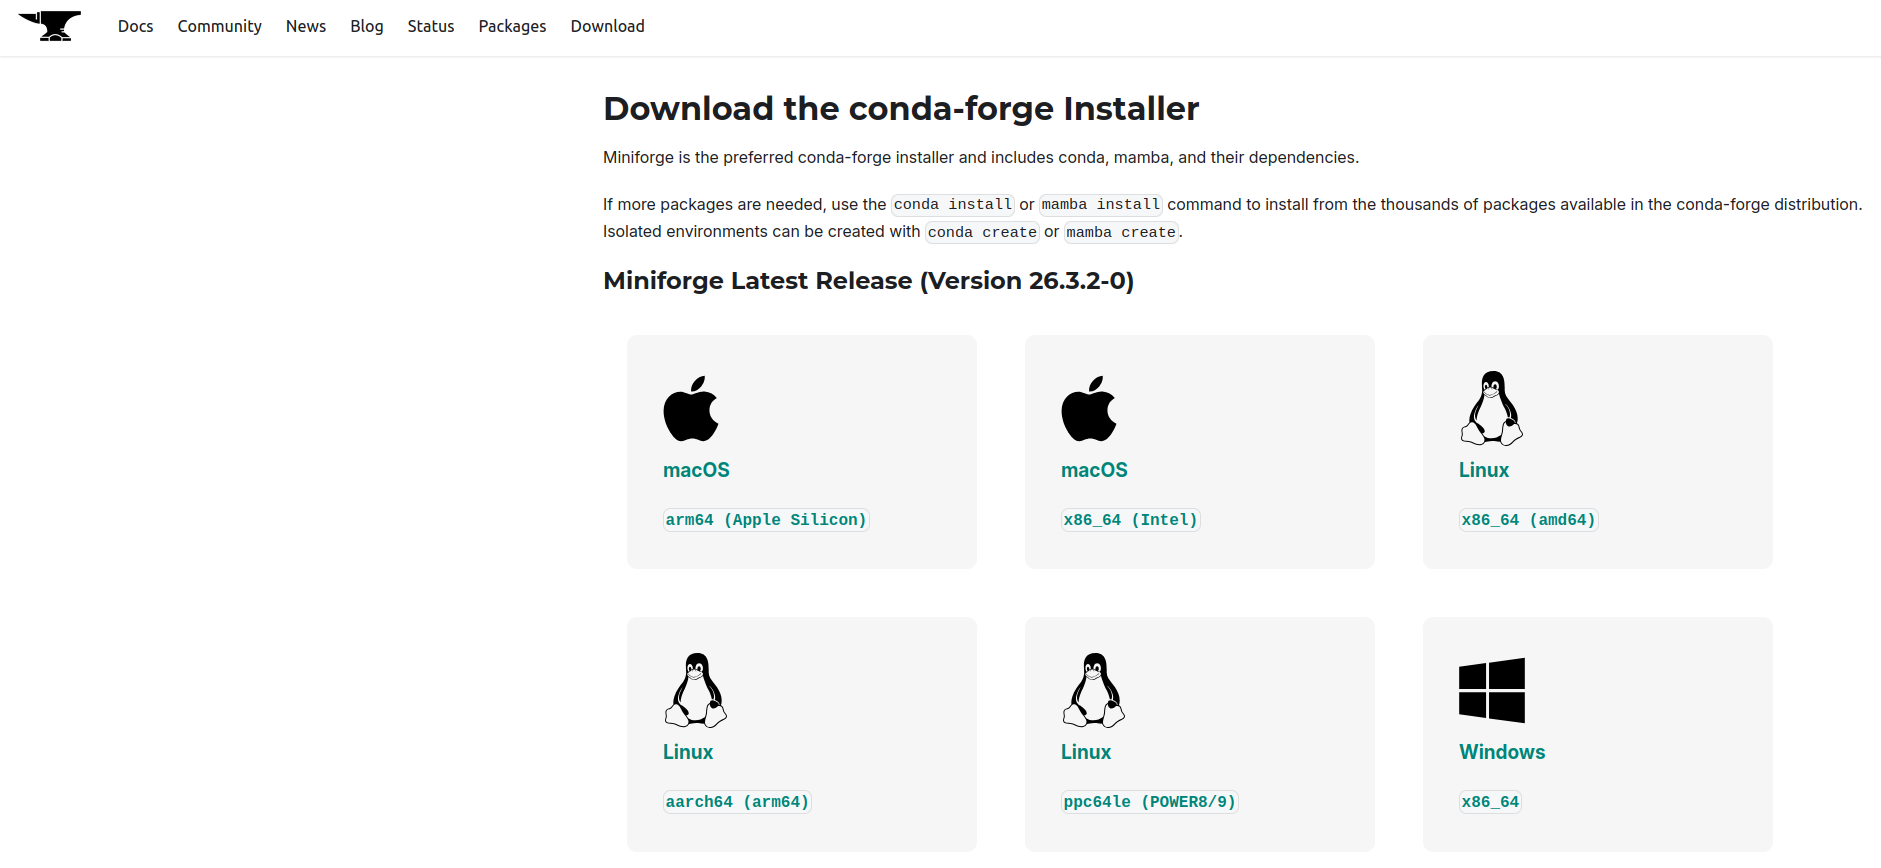
Visit https://conda-forge.org/download/. Download and install the appropriate version for your system (Windows, Linux or Mac):
Execute Installer
Follow the installation wizard and accept the defaults!

Step 5 Start Miniforge Prompt
Use the Windows Search to search for the Miniforge Prompt and start it! 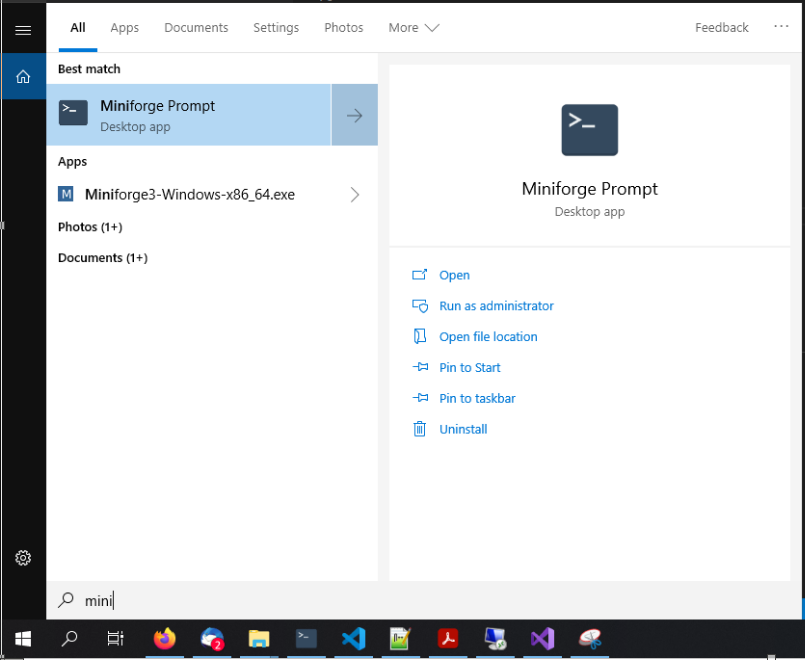
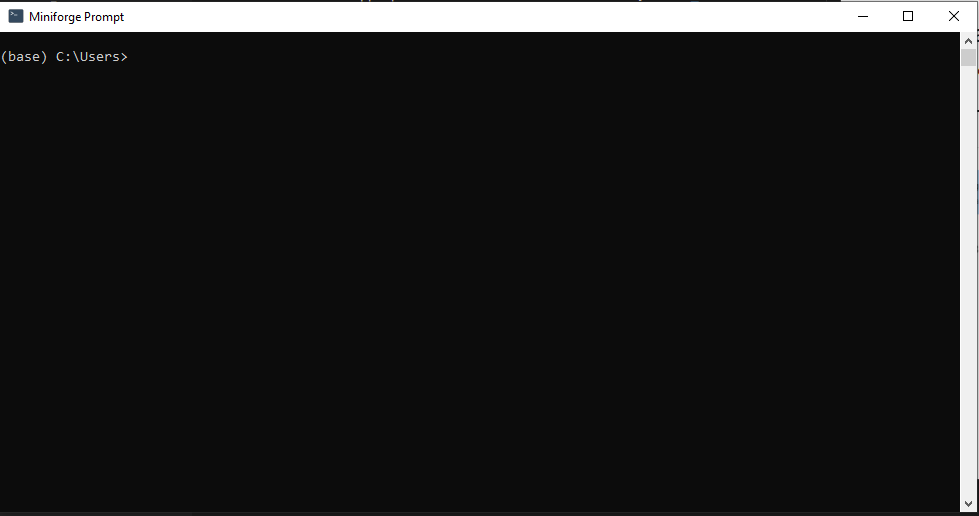
This should look similar to this:
In the moment we are in the miniforge so-called (base) environment. For our purpose we want to create our own encapsulated environment.
In this encapsulated environment, we can install an isolated Python version (not conflicting with other installations on our computer) and add a customized set of selected Python packages.
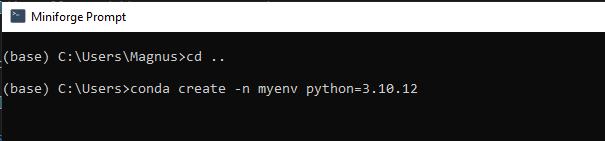
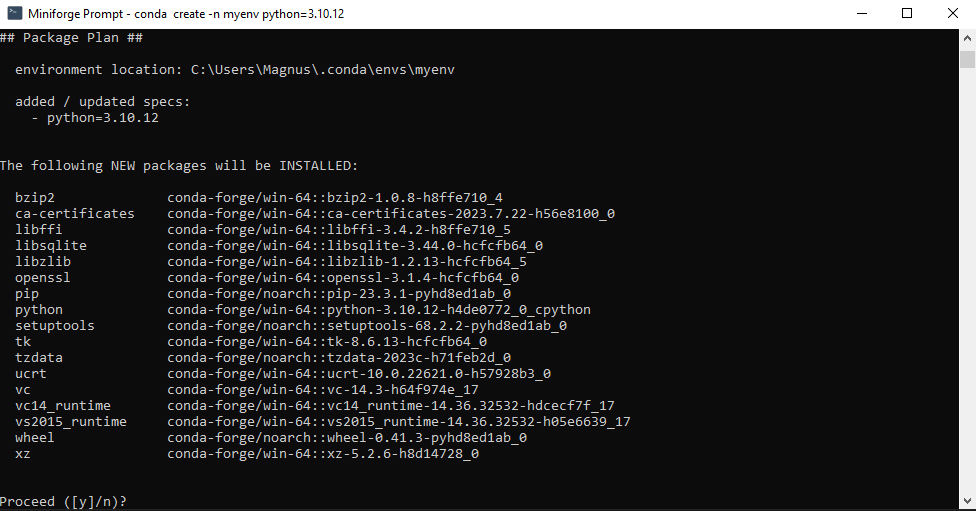
Step 6: Create your own Python Environment
- Create a new conda environment called e.g. myenv
- Define a Python version to be installed within this environment
Choosing the correct Python Version
Currently, LIS Pro 3D is delivered with the Python API for Python 3.9, Python 3.10, Python 3.11, Python 3.12, Python 3.13 and Python 3.14. If you have not yet worked with Python, choose the newest one. However, if you have already designed Python workflows and you want to integrate them with LIS Pro 3D, keep with your current python version.
In this tutorial we will work with Python 3.10.
Write and execute conda create -n myenv python=3.10 (the micro version .12 does not necessarily need to be specified):
Confirm and proceed by typing y and ENTER
Later, when calling the PySAGA package from within Python you have to take care to use the very same Python environment (in this case myenv), that was set up for usage with LIS Pro 3D!
If you ever want to start the setup of Python for LIS Pro 3D again, you can simply create a new Python environment by issuing conda create -n <name-of-new-environment> python=<python-version>.
In that case - optionally - you could also remove our environment myenv (in case you no longer need it because you created another environment to be used with LIS Pro 3D), by typing conda remove -n myenv
Step 7: Start your Python Environment
After the creation of your environment is finished, you can type: conda activate myenv (or the name that you have chosen for your conda Python environment)

Now in each line the (myenv) shows that you are in your own environment. By typing conda deactivate, you will get to the base environment again.
We are now done with the installation of Miniforge and Python, but we haven’t connected the new environment myenv with the LIS Pro 3D installation yet!
Note that you can create and maintain multiple Python environments on the same machine. Even if this might initially seem irrelevant or even be confusing, being able to use different versions of Python, each in its own (encapsulated) environment is eventually one of the great advantages of environments!
Environments allow you to switch easily between several Python versions and packages inside these environments on a single machine. You can easily create environments with the latest version of Python or delete environments that you no longer need.
Step 8: Find and Copy the PySAGA Package to your LIS Pro 3D Installation
Now we want to copy the SAGA Python API folder into the installation directory of your LIS Pro 3D installation!
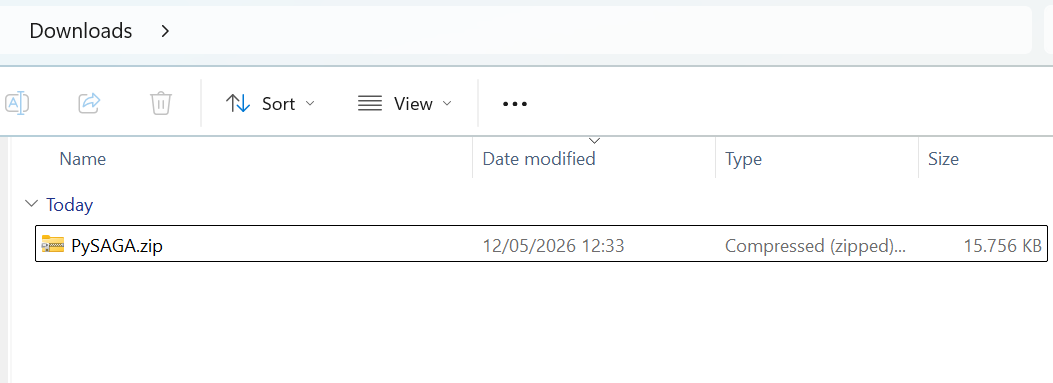
Besides the LIS Pro 3D installer you will find the PySAGA.zip package (Usually provided as a download link after software purchase or with a new version update notification)
Extract the PySAGA.zip! Within the unpacked folder you will find a set of zip-files, all built for a specific python version:
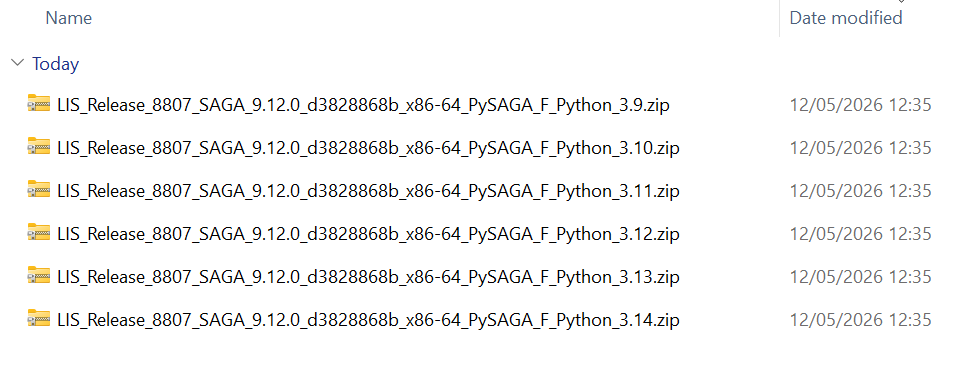
- LIS_Release_8807_SAGA_9.12.0_d3828868b_x86-64_PySAGA_F_Python_3.9.zip
- LIS_Release_8807_SAGA_9.12.0_d3828868b_x86-64_PySAGA_F_Python_3.10.zip
- LIS_Release_8807_SAGA_9.12.0_d3828868b_x86-64_PySAGA_F_Python_3.11.zip
- LIS_Release_8807_SAGA_9.12.0_d3828868b_x86-64_PySAGA_F_Python_3.12.zip
- LIS_Release_8807_SAGA_9.12.0_d3828868b_x86-64_PySAGA_F_Python_3.13.zip
- LIS_Release_8807_SAGA_9.12.0_d3828868b_x86-64_PySAGA_F_Python_3.14.zip
Choose the one that matches your Conda environment (in this example Python_3.10)
From the LIS Pro 3D perspective, all PySAGA versions provided with your LIS Pro 3D release are compatible.
Your choice mainly depends on the Python version you use in your Conda environment and on compatibility with other Python libraries in your workflow. If your current setup works well, stay with that Python version.
The Python version of your Conda environment must match the selected PySAGA package.
For example:
Conda environment: Python 3.10
PySAGA package: Python_3.10
Do not use a PySAGA package for a different Python version.
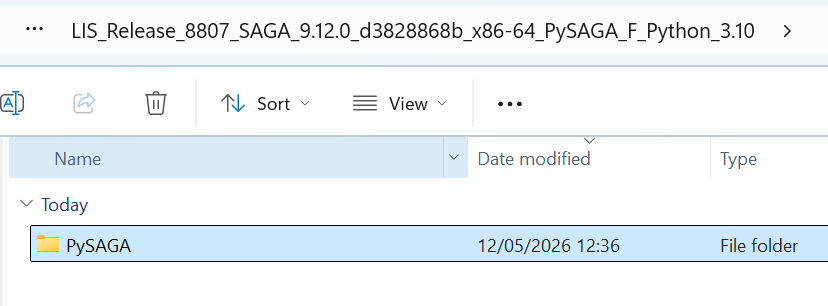
After the extraction of one Python version, you will find a folder called PySAGA in the LIS_Release_8807_SAGA_9.12.0_d3828868b_x86-64_PySAGA_F_Python_3.10 folder.
Please note that the name of the folder (LIS_Release_8807_SAGA_9.12.0_d3828868b_x86-64_PySAGA_F_Python_3.10.zip) will likely differ! You will very likely have a more recent SAGA version (> 9.12) and Python version (>= 3.10).
Now simply copy the PySAGA folder and paste it into your LIS Pro 3D installation folder (This is the folder, that contains saga_gui.exe)
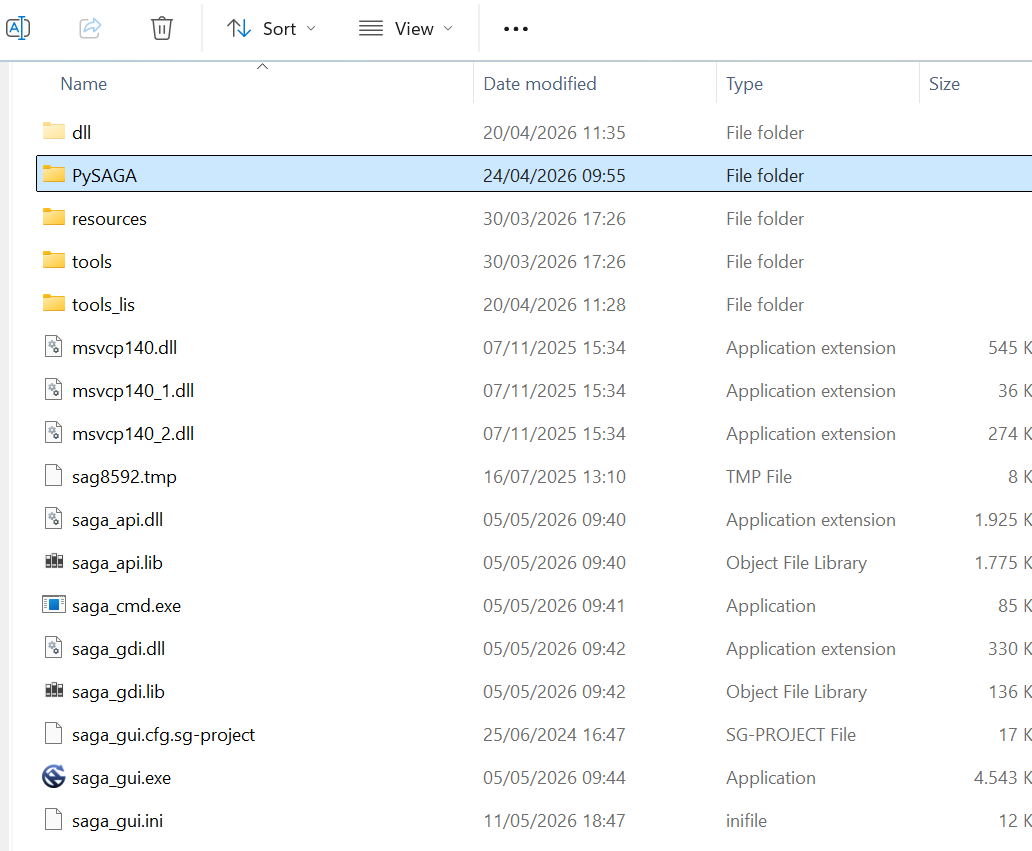
Recall Step 1.4 which shows your LIS Pro 3D installation folder (C:\Program Files\Laserdata\LIS Pro 3D). In the file explorer, navigate to the LIS Pro 3D installation folder, then right click inside the folder and click on Paste to insert the PySAGA folder at this location.
Get Syntax Highlighting and Auto-Completion for PySAGA in VSCode
Finally, we want to add the location of the PySAGA package to the settings of the VSCode Python extension to benefit from syntax highlighting and auto-completion! While this is not mandatory to successfully run any LIS Pro 3D tools with Python, we highly recommend to do this for an improved user experience.
Inside VSCode, open the user settings by pressing “CTRL + SHIFT + P” and entering “user settings”. Then select “Settings: Open User Settings (JSON)” from the displayed suggestions.

Add the following entries (without the enclosing brackets) with the LIS Pro 3D installation path to the “settings.json” file and save the changes:
{
    "python.analysis.extraPaths": [
        "C:/Program Files/Laserdata/LIS Pro 3D"
    ],
    "python.autoComplete.extraPaths": [
        "C:/Program Files/Laserdata/LIS Pro 3D"
    ],
}
The settings.json should look similar to this:
{
    "window.autoDetectColorScheme": true,
    "workbench.preferredLightColorTheme": "Dark 2026",
    "python.defaultInterpreterPath": "C:\\Users\\laser\\miniforge3\\python.exe",

    "python.analysis.extraPaths": ["C:/Program Files/Laserdata/LIS Pro 3D"],
    "python.autoComplete.extraPaths": ["C:/Program Files/Laserdata/LIS Pro 3D"],
}Take care that there is a comma after every entry, otherwise you will get a syntax error.
Step 9: Verify the Python Integration
- Inside the Miniforge prompt, make sure that
myenvis active
conda activate myenvYour prompt should now look similar to this:
(myenv) C:\Users\laser>- Change to any of your folders (here
test):
cd C:\LiDAR_Data\testYou should now see something similar to:
(myenv) C:\LiDAR_Data\test>- Paste the following command into the Miniforge Prompt and Enter (it will generate a
project_config.pyfile in the previously selected folder):
(
echo import os
echo import sys
echo.
echo os.environ["SAGA_PATH"] = r"C:\Program Files\Laserdata\LIS Pro 3D"
echo.
echo sys.path.insert(0, os.environ["SAGA_PATH"]^)
) > project_config.pyIf you have a differing installation path, change it to your custom path!
- From within the Miniforge prompt, start the Python interpreter by typing and executing:
python- From within the Python interpreter (indicated by
>>>), enter exactly the given sequence!
>>> import project_config as cfg
>>> from PySAGA.tools import lis_tools
>>> lis_tools.About_LIS()We here 1) try to import the previously generated project_config and then 2) try to import lis_tools and 3) execute lis_tools.About_LIS()
If you get an error similar to shown below, you have to revise your installation or get help from the user support.
Python 3.10.12 | packaged by conda-forge | (main, Jun 23 2023, 22:34:57) [MSC v.1936 64 bit (AMD64)] on win32
Type "help", "copyright", "credits" or "license" for more information.
>>> import project_config as cfg
>>> from PySAGA.tools import lis_tools
Traceback (most recent call last):
  File "<stdin>", line 1, in <module>
ModuleNotFoundError: No module named 'PySAGA'
If the command prints the information and executes without error, you successfully integrated LIS Pro 3D with Python.
LIS Pro 3D
[2026-05-16-3000]

Copyrights (c) 2007-2026 by LASERDATA GmbH
Version 2026.02
Release 8888 (2026-03-21)

Licensed packages:
LIS Pro 3D
City Modeller
Forestry
Geology
Road Modeller

Licensed to:
Max Mustermann
Amt fuer Mustererkennung
Musterstr. 1
1111 Musterstadt
Musterland

This is a perpetual version (GUI).
__________________________________________

Contact:
LASERDATA GmbH
Technikerstr. 21a
6020 Innsbruck
Austria

www.laserdata.at

__________________________________________
Close the python interpreter again:
>>> exit()Congratulations! Now you are ready to automate your processing workflows in LIS Pro 3D with Python!
Optional: Install Additional Python Modules
At this stage, you do not immediately need any additional Python packages. However, it is recommended to already familiarize yourself with installing packages into your Conda environment, since you will likely extend your Python setup later with additional libraries and tools.
Before installing packages, make sure that your Conda environment is activated (conda activate myenv)!
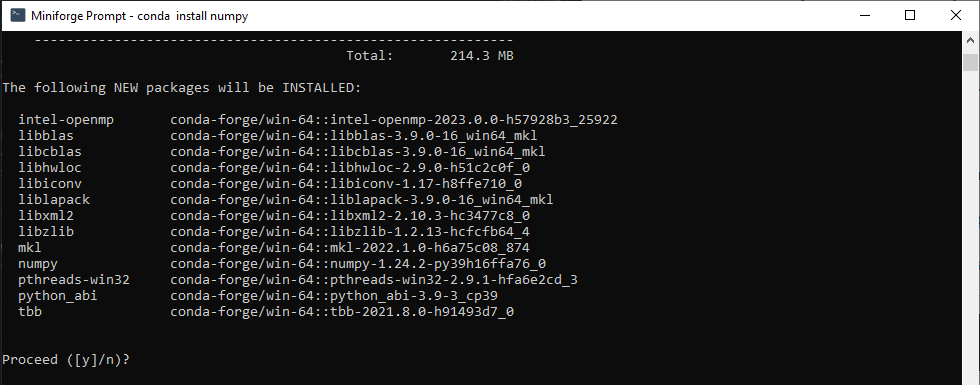
Type: conda install numpy in order to install numpy

proceed with y
Type: conda install scipy in order to install scipy
Type: conda install matplotlib in order to install matplotlib
Type: conda install folium in order to install folium (used to create leaflet maps for the web)
You can also install these packages in one go by executing conda install numpy scipy matplotlib folium