In this tutorial you will learn how to prepare your data for efficient processing and how to automate this preparation with python.
< previous tutorial … next tutorial >
Introduction
When it comes to the development of a new processing workflow, it is advisable to try it out in the graphical user interface of LIS Pro 3D first. This speeds up the learning process compared to pure python development and gives a visual understanding of how all the tools work together to help solve a processing problem.
In the following, you will learn how to use different tools for preparing lidar data for a typical processing task and how to quickly convert this into python code.
Even if you are only interested in writing python scripts, it is worth taking this tour through the graphical user interface of LIS Pro 3D and how it’s functionality is linked to python.
Take care that you have installed everything as described in the installation tutorial.
Step 1: Make sure you have the correct folder structure
If you have not yet the folder structure from the previous tutorial, do the following steps (1.1-1.5)!
Step 1.1: Create a new folder for your project
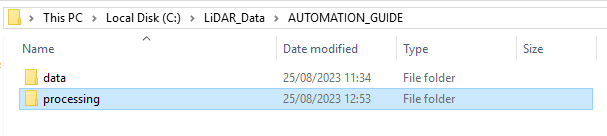
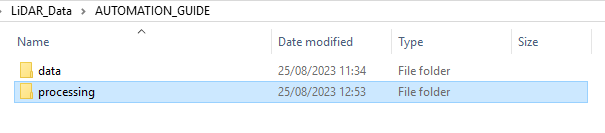
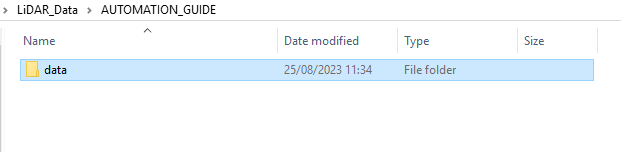
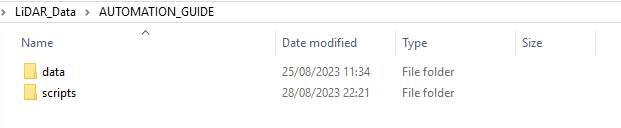
Create a folder called AUTOMATION_GUIDE or something similar!

Step 1.2: Create a new folder for your input data
Within the folder AUTOMATION_GUIDE create a folder data with the subfolder las and put your available input *.laz-files in it!

Step 1.3: Create a new processing folder
The folder where all your outputs will be saved
Step 1.4: Create your output folders
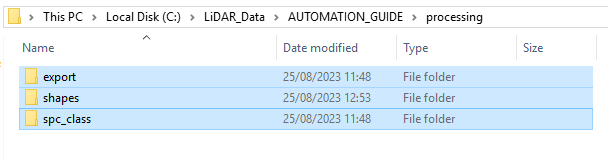
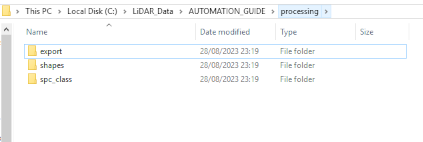
Within the processing folder, create the folder, where all your outputs will be saved! These folders are called:
- export (the folder for your final output)
- shapes (the folder for shapefiles describing the extent of your available data)
- spc_class (the folder for the classified output pointclouds)
We will learn how to automatically create this folder structure later!
Step 1.5: Open LIS Pro 3D Graphical User Interface
Find it in your installed programms. It is recommended to use a desktop shortcut.
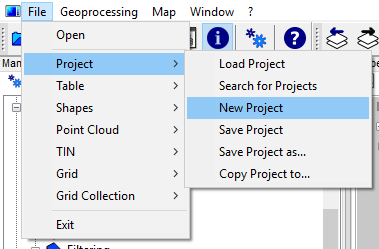
Step 2: Open new project
If you have any data open in LIS Pro 3D, open a new clear new project!
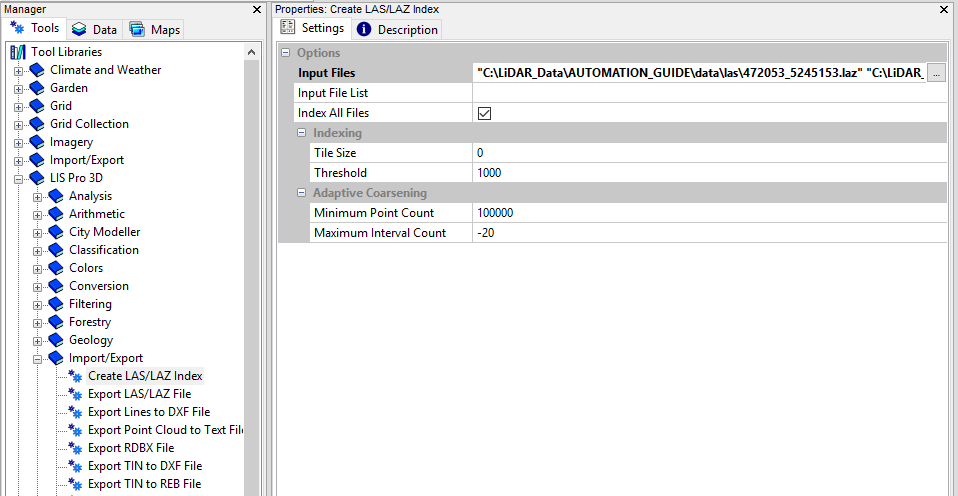
Step 3: Create LAS/LAZ Index
Use LIS Pro 3D > Import/Export > Create LAS/LAZ Index!
- provide all available LAS/LAZ-files as Input Files.
- click Execute!
(it creates spatial indices for the input LAZ files to speed up spatial queries later)
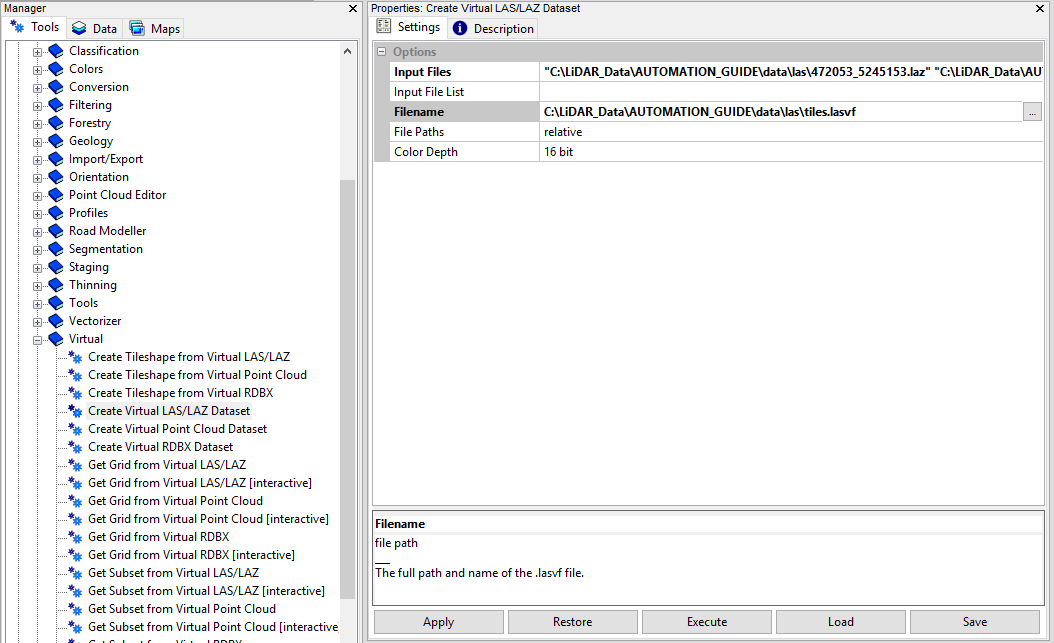
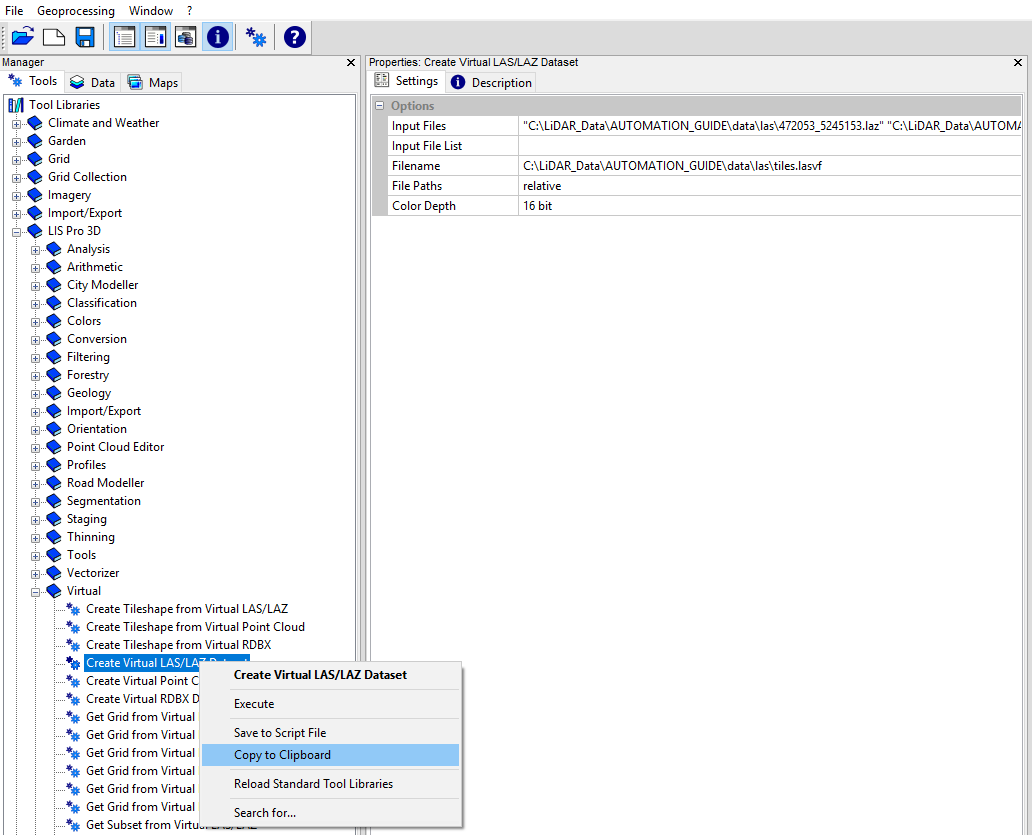
Step 4: Create a Point Cloud Catalog
Create a Point Cloud Catalog for the laz files. Run LIS Pro 3D > Virtual > Create Virtual LAS/LAZ Dataset.
provide all available LAS/LAZ-files as Input Files.
define an output *.lasvf-file (put it into the location of the laz files)
click Execute!
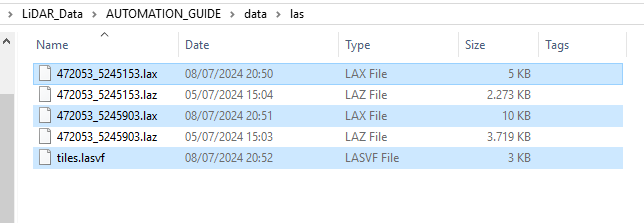
As a result of step 3 and 4, additional files have been created in the data folder. These files allow a convenient access to the available data (in this case the available data are two laz-files).
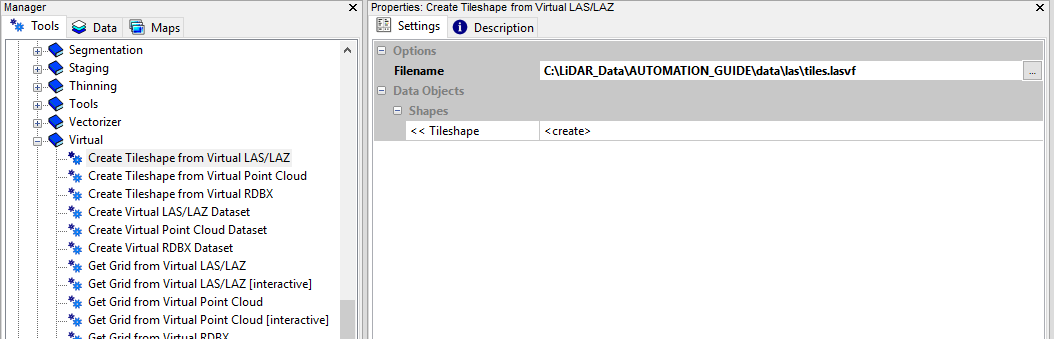
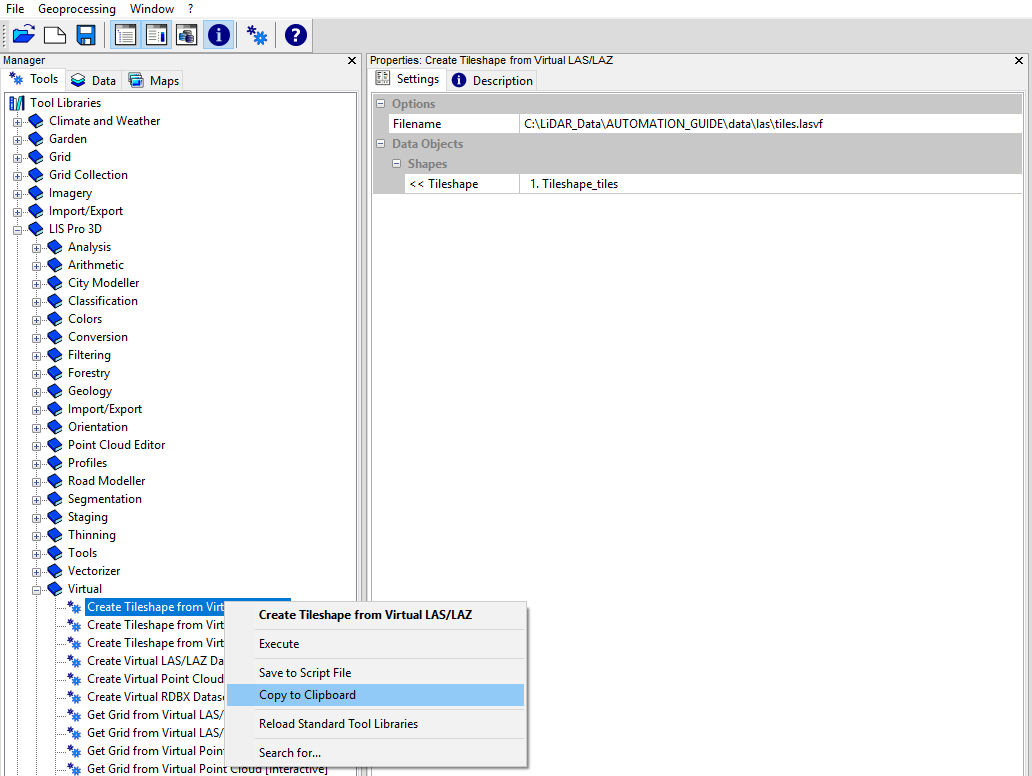
Step 5: Create a Tileshape for your total data
Use LIS Pro 3D > Virtual > Create Tileshape from Virtual LAS/LAZ.
provide the *.lasvf file as Filename!
click Execute!
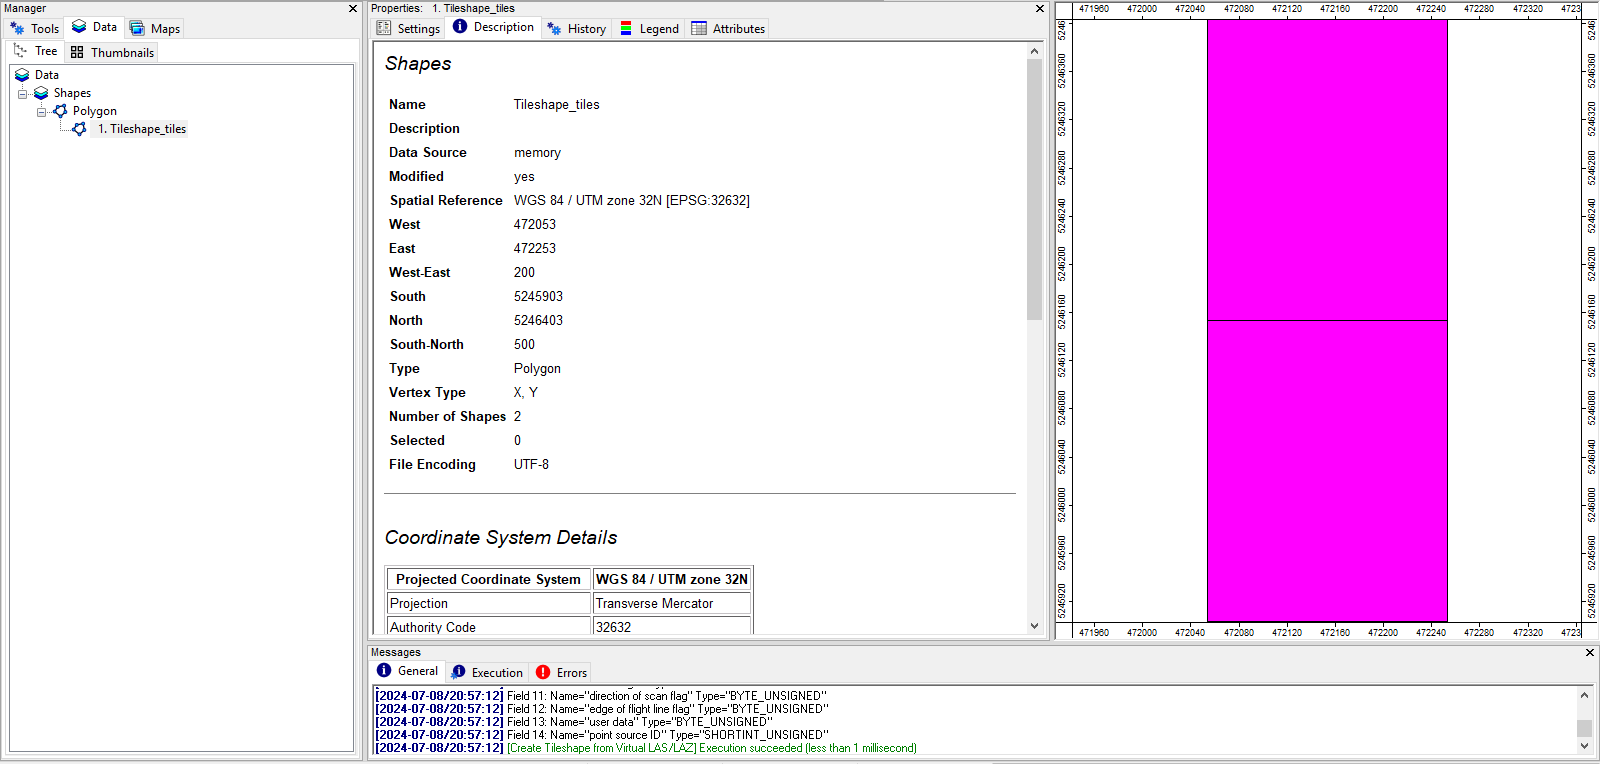
You can find the resulting tile shape in the data tab
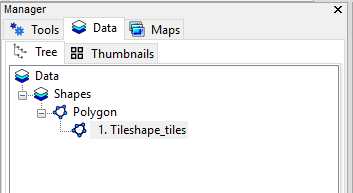
Double-click on it in order to open it in a map.
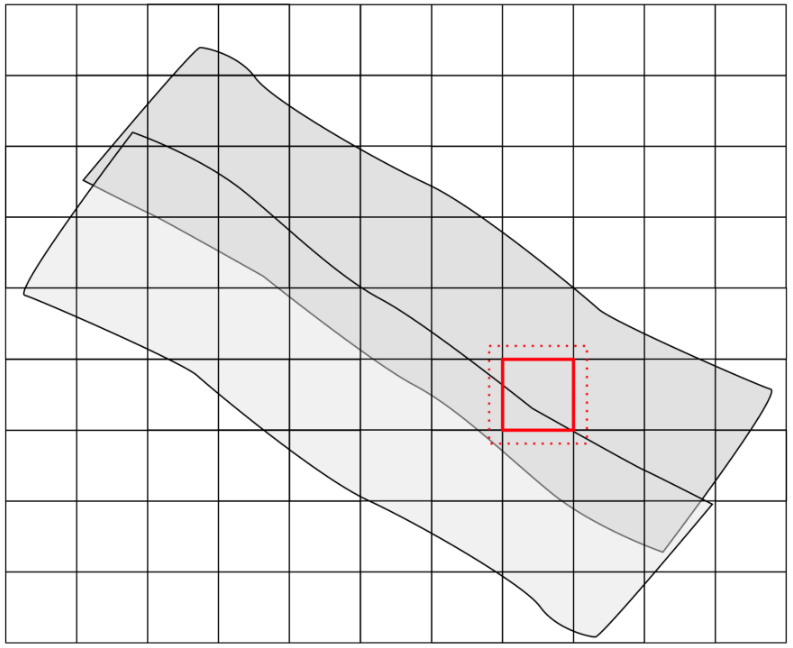
You can see the footprints of both laz data sets as shapefiles.
Save the tile_shape into the shapes folder of your project!
Step 6: Create a tiling scheme for your processing
Create a tiling scheme for your processing. This can be absolutely independent from the physical tiling of data.
In order to have an idea of the overall extent of your data, you can use the tile shape of the previous step as an orientation.
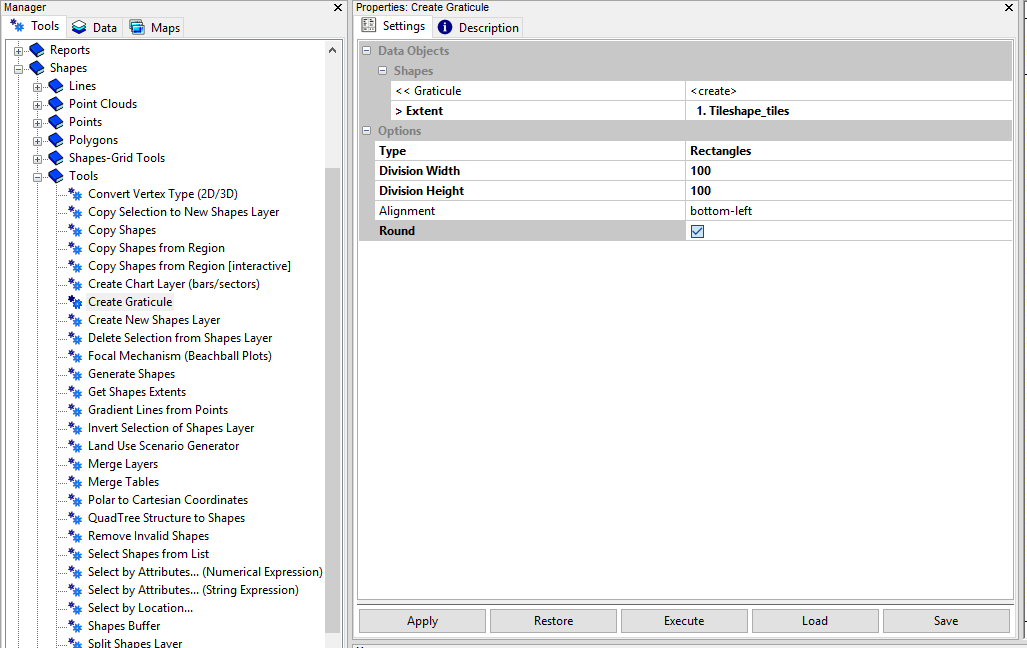
Run Shapes > Tools > Create Graticule.
provide the tile shape as Extent
Choose Rectangles in order to get a polygon output
choose Round
choose Division Height and Division Width. Use 100m.
click Execute
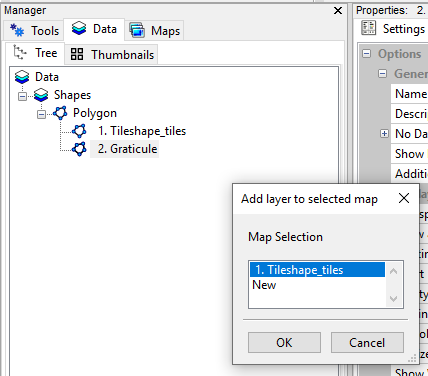
The graticule appears in the data tab
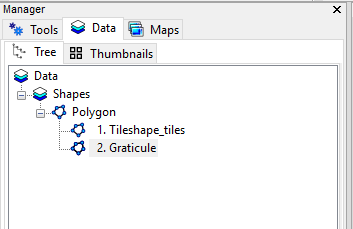
Double-click on it, in order to add it to the existing map of the tile shape.
In the Maps Tab toggle between both data sets of the map by clicking on them.
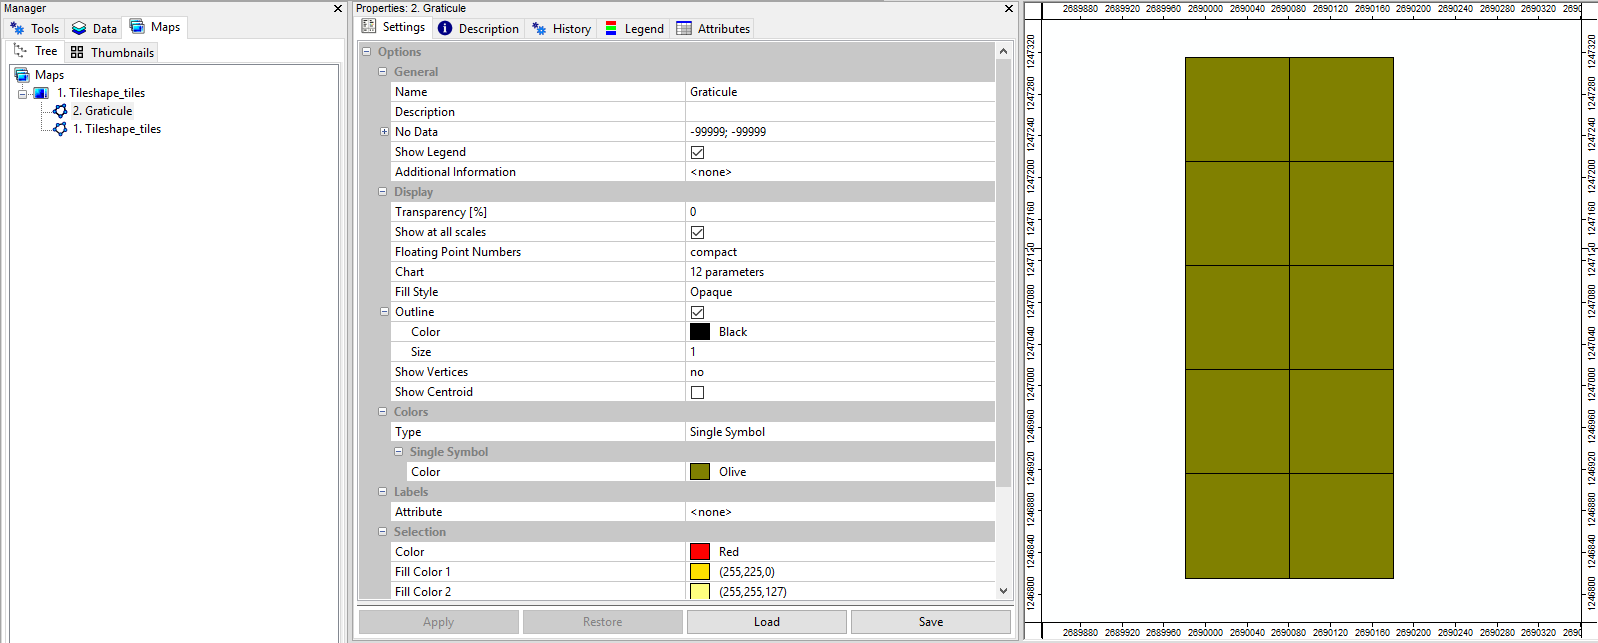
You can see that you have created a much smaller tiling scheme compared to the input tile sizes.
Step 7: Test different tile sizes
Run Shapes > Tools > Create Graticule again.
change the Division Height and Division Width to 10. The graticule in the map will update. Test different tile sizes!

Step 8: Create graticules with tile size 100 & 300m
Save a graticule with tilesize 100 into the shapes folder of your project!
Save a graticule with tilesize 300 into the shapes folder of your project!
Step 9: Create graticule with one single tile
Run Shapes > Tools > Create Graticule again.
change the Division Width to 200 and the Division Height to 500.
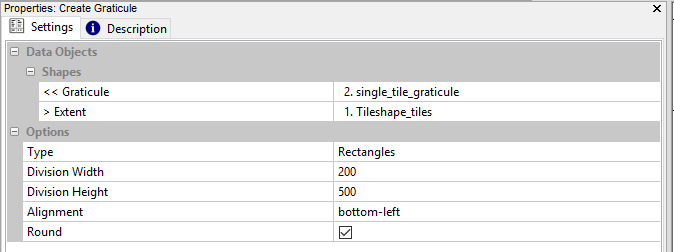
Save the graticule into the shapes folder of your project as single_tile_graticule.shp!
Step 10: GUI Conclusion
We have designed a data preparation workflow in the GUI. Thereby, we have added las-index files (.lax ) to the data/las folder and created a virtual point cloud file (*.lasvf).
and we have added different tile shapes (*.shp ) to the prosessing/shapes folder.

The workflow includes the preparation of folders and these four main steps:
Create LAS/LAZ Index
Create a Point Cloud Catalog
Create a Tileshape for your total data
Create a tiling scheme for your processing 100,300,200/500m
Now we want to automate these steps, using python scripting.
Step 11: Delete all prepared datasets and folders
Step 11.1 Delete processing folder
Delete processing folder, because we want to create this folder with its subfolders automatically using python.
Step 11.2 Delete lax and lasvf files
Delete lax and lasvf files in data folder, because we want to create this folder with its subfolders automatically using python.
In the end we have only our project folder (AUTOMATION_GUIDE) and within the project folder the data/las folder with two *.laz-files.
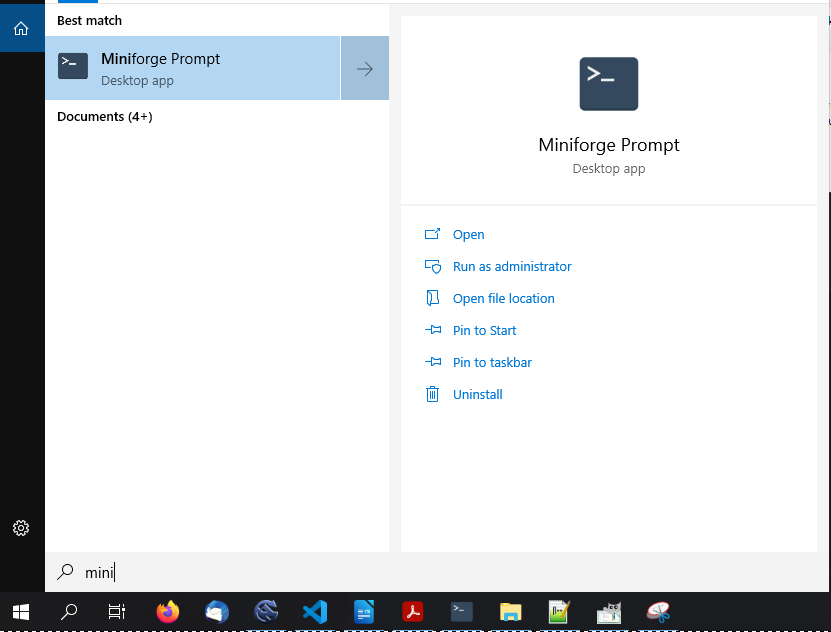
Step 12: Open Miniforge Prompt
Search for the Miniforge Prompt and open it.
Miniforge is only a suggestion for these tutorials. You can use any other python package manager such as Anaconda, Miniconda, etc. or any python installation running without a package manager.
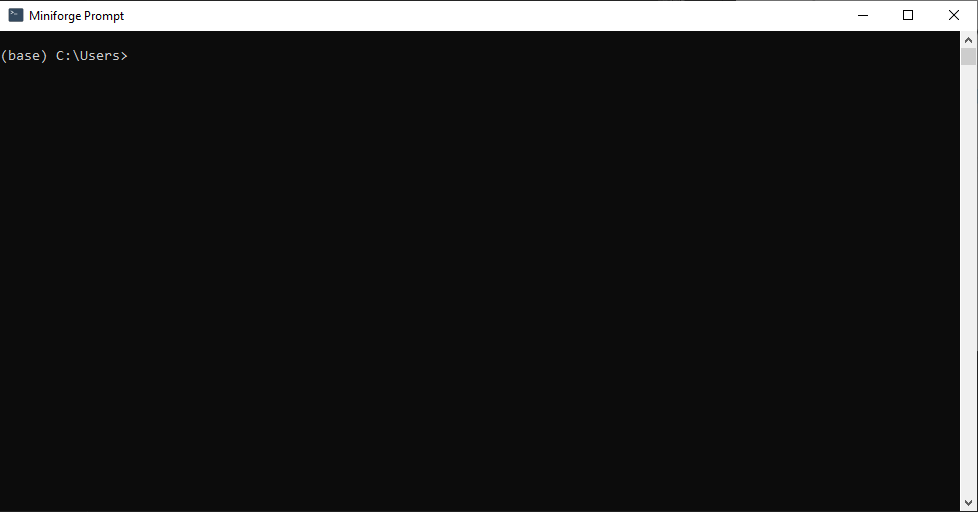
This will look like this:
Step 13: Go to your project directory
Copy the path to your project folder (CTRL - C)

In Miniforge Prompt type cd + space and right-click after the space in order to paste the path you have copied. Type Enter!
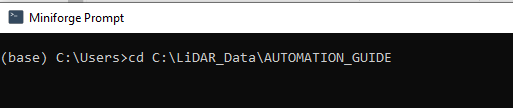
Thereby, you change your current directory to the project directory

Step 14: Start your own conda environment
Initially you are in the (base) environment of conda. Type conda activate environmentName in order to use your own environment with all the installed modules (see installation tutorial)! Type Enter!

In this case the environment is called (myenv). On the left side we can see that we are in the (myenv) environment now.
Note, that after this switch, the current working directory is still the same.
Step 15: Create a scripts folder for your python scripts
Create a scripts folder for your python scripts by typing mkdir scripts. Type Enter!

A new scripts folder has been created:
Step 16: Go to the scripts folder
Type cd scripts in order to go to the scripts folder. Type Enter!
The scripts folder is still empty.

Step 17: Start Visual Studio Code
Type code + space + . in order to start Visual Studio Code from the scripts directory (the current directory). Type Enter!

Visual Studio Code will open
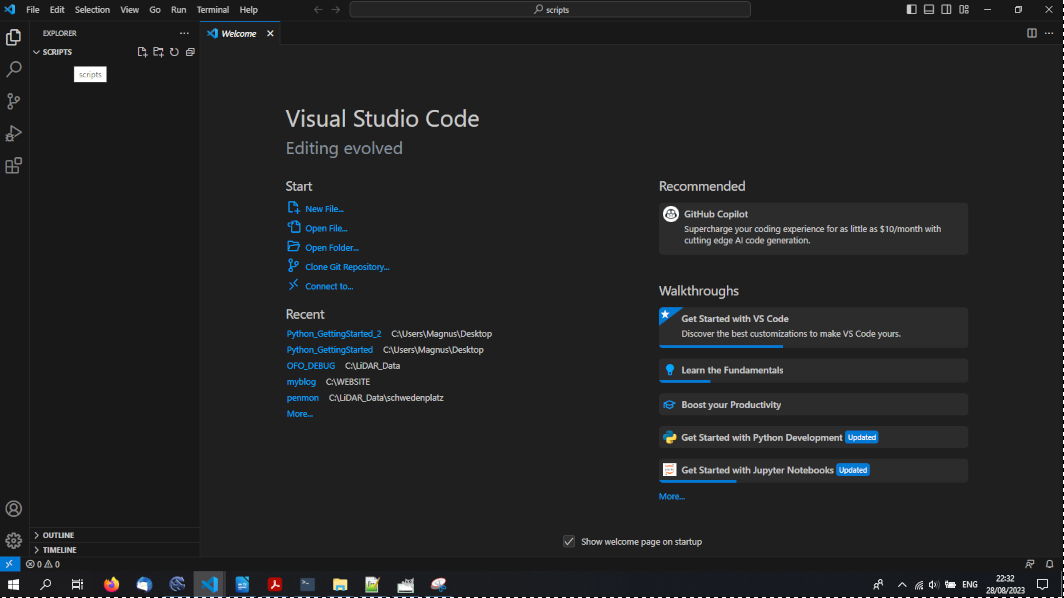
On the left side you see that you are in the scripts folder and that this folder is still empty.
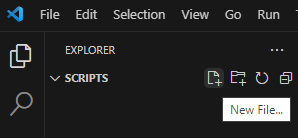
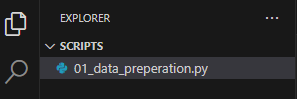
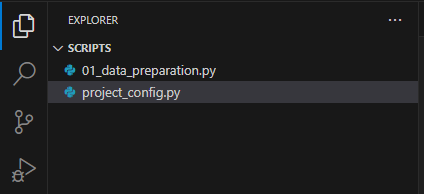
Step 18: Create some python scripts
Go to the New File button in the upper-left section and create a new script called 01_data_preparation.py
To have more structured code in the end we create also a configuration script called project_config.py, where all our settings are defined
Step 19: Check if the correct python installation is used
Type ctrl + shift + P to go to the following drop-down menu:
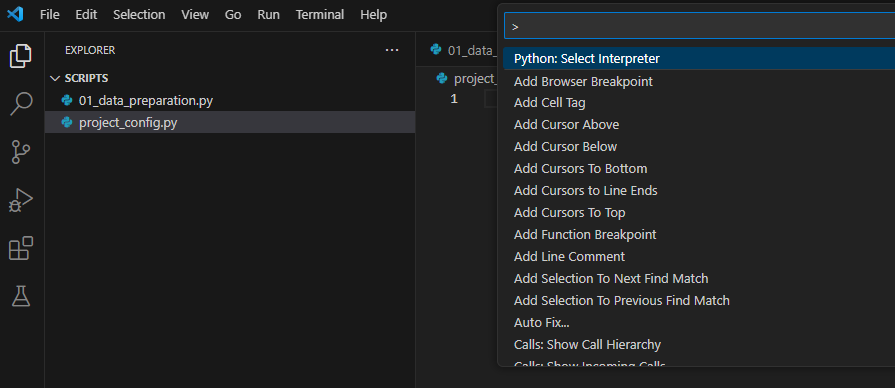
Find and click on Python: Select Interpreter!
Here, the python installation of your environment (myenv) should be shown and should be selected. If not, add the correct path (see installation tutorial).

If everything is set correctly here, we can start scripting.
Check this at the beginning of every coding session. Especially, if you have multiple environments, with different modules installed.
Step 20: Fill the project_config.py
Copy the following code into your project_config.py script:
Use the upper-right button of the code block in order to copy the whole code in one go!import os
# -----------------------------------------------------------------------------
# processing directories
#
BASEDIR = 'C:' + os.sep + 'LiDAR_Data' + os.sep + 'AUTOMATION_GUIDE'
LASINDIR = BASEDIR + os.sep + 'data' + os.sep + 'las'
PROCESSDIR = BASEDIR + os.sep + 'processing'
SHAPESDIR = PROCESSDIR + os.sep + 'shapes'
SPCCLASSDIR = PROCESSDIR + os.sep + 'spc_class'
EXPORTDIR = PROCESSDIR + os.sep + 'export'
# -----------------------------------------------------------------------------
# -----------------------------------------------------------------------------
# create (non-existing) dirs
if not os.path.exists(PROCESSDIR): os.makedirs(PROCESSDIR)
if not os.path.exists(SHAPESDIR): os.makedirs(SHAPESDIR)
if not os.path.exists(SPCCLASSDIR): os.makedirs(SPCCLASSDIR)
if not os.path.exists(EXPORTDIR): os.makedirs(EXPORTDIR)
# -----------------------------------------------------------------------------Change the BASEDIR to the working directory you are using on your own machine!
BASEDIR = 'C:' + os.sep + 'LiDAR_Data' + os.sep + 'AUTOMATION_GUIDE'Step 21: Set some parameter settings and filenames in project_config.py
Add the following code below the existing one.
# -----------------------------------------------------------------------------
# global settings: files, tool parameters, ...
#
TILESHAPE_100    = SHAPESDIR + os.sep + 'Tiles_100.shp'
TILESHAPE_300      = SHAPESDIR + os.sep + 'Tiles_300.shp'
TILESHAPE_500      = SHAPESDIR + os.sep + 'Tiles_500.shp'
LASVF                   = LASINDIR + os.sep + 'tiles.lasvf'


TILE_SIZE_PROCESSING    = 100.0
TILE_SIZE_DELIVERY      = 300.0
Note that these are the filenames of the datasets and the parameters, that we have already used in the graphical user interface.
Select the project_config.py file and run it by clicking onto the play button in the upper right corner.
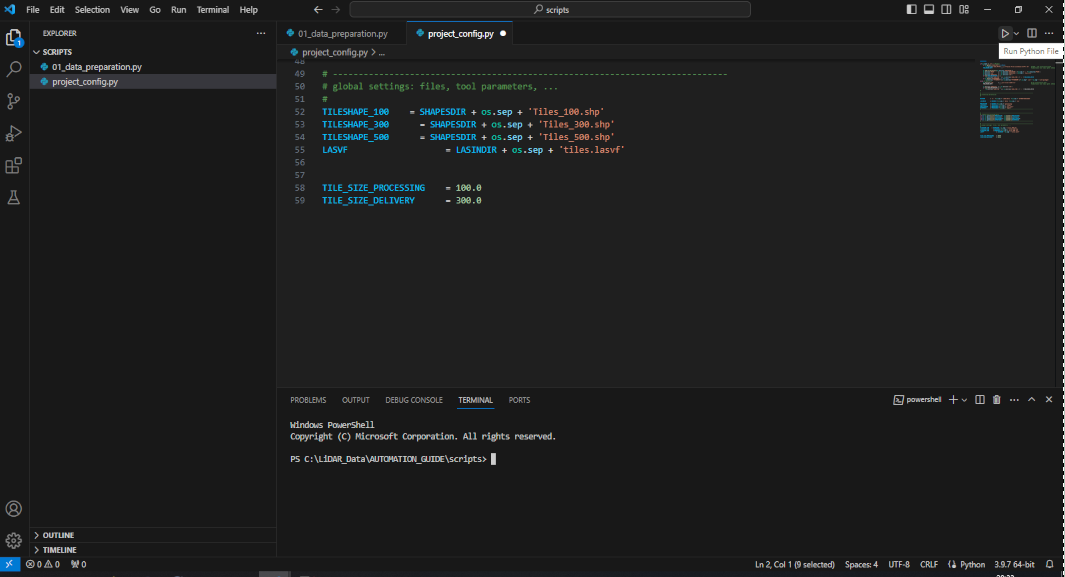
After execution, all necessary folders have been automatically created:
Step 22: Start creating your 01_data_preparation.py script
Copy the code into your 01_data_preparation.py script!
import os
import project_config as cfg
from PySAGA import saga_api, lis_cmd


def Task(TaskNum=0):
    return True


# -----------------------------------------------------------------------------
# -----------------------------------------------------------------------------
# -----------------------------------------------------------------------------
# the main function
#
if __name__ == '__main__':
    # -----------------------------------------------------------------------------
    # start the logging

    starttime = lis_cmd.Start_Logging(False)

    # -----------------------------------------------------------------------------
    # call the processing function
    result = Task()

    if not result:
        lis_cmd.Error_Exit('Processing task failed', starttime)


    # -----------------------------------------------------------------------------
    # stop logging
    lis_cmd.Stop_Logging(starttime)
This script does the following steps:
import relevant modules
defining a task to be done (still empty)
starttime
run the task that we will be implementing
stoptime
You can already see that all the performed operations will be wrapped into the Task() function on top and later called in the main function. This is not necessary, but it helps in parallelizing your code later.
If you are not familiar with python functions and how they can help you structuring your code, go through the example in the Getting Started with Python tutorial (Step 20) or search for materials in the web!
Now we want to add the four steps that we have already performed in the graphical user interface.
Create LAS/LAZ Index
Create a Point Cloud Catalog
Create a Tileshape for your total data
Create a tiling scheme for your processing 100,300,200/500m
Step 23: Create LAZ File List
First of all, we want to create a list of all available laz files.
- create list of files within the cfg.LASINDIR folder, which is defined in project_config.py. (this is done by the LIS Pro 3D helper function lis_cmd.Create_File_List())
The list of files is a textfile in the target folder and the variable inputfiles points onto this textfile. Thus, tools can use this variable to load the filelist later.
inputfiles = lis_cmd.Create_File_List(cfg.LASINDIR, '.las;.laz', cfg.LASINDIR + os.sep + 'lasvf_input_file_list.txt')This code we put into our Task() function.
import os
import project_config as cfg
from PySAGA import saga_api, lis_cmd


def Task(TaskNum=0):

    inputfiles = lis_cmd.Create_File_List(cfg.LASINDIR, '.las;.laz', cfg.LASINDIR + os.sep + 'lasvf_input_file_list.txt')

    return True


# -----------------------------------------------------------------------------
# -----------------------------------------------------------------------------
# -----------------------------------------------------------------------------
# the main function
#
if __name__ == '__main__':
    # -----------------------------------------------------------------------------
    # start the logging

    starttime = lis_cmd.Start_Logging(False)

    # -----------------------------------------------------------------------------
    # call the processing function
    result = Task()

    if not result:
        lis_cmd.Error_Exit('Processing task failed', starttime)


    # -----------------------------------------------------------------------------
    # stop logging
    lis_cmd.Stop_Logging(starttime)
Step 24: Add Code for LAS/LAZ Index
We have already executed LIS Pro 3D > Import/Export > Create LAS/LAZ Index in the GUI.
Note that LIS Pro 3D remembers all the settings that we have made. We can use this feature in order to quickly get the python code for this tool execution.
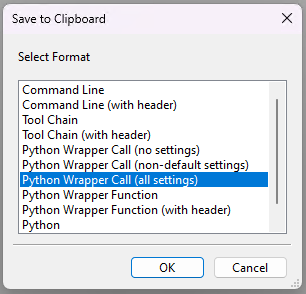
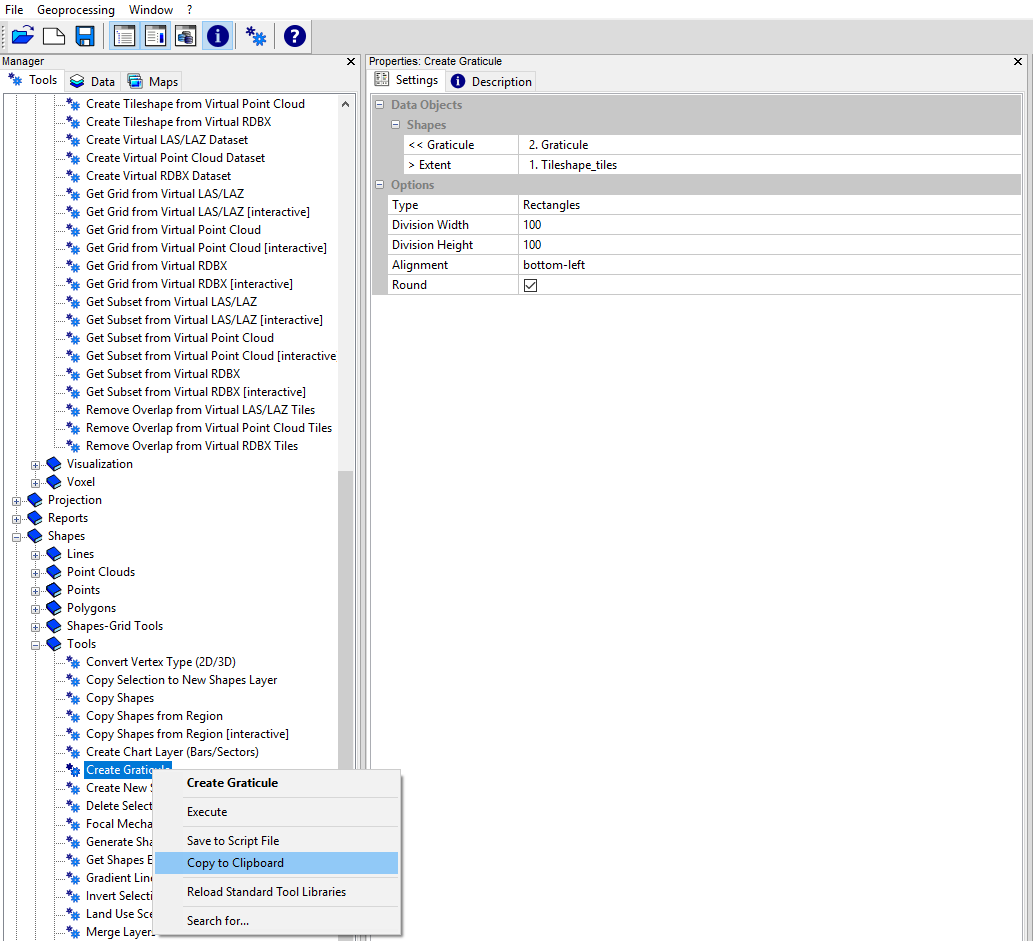
Step 24.1: Copy to Clipboard
Right-click onto the Tool in the Tools Tab and in the drop-down-menu choose copy to clipboard!
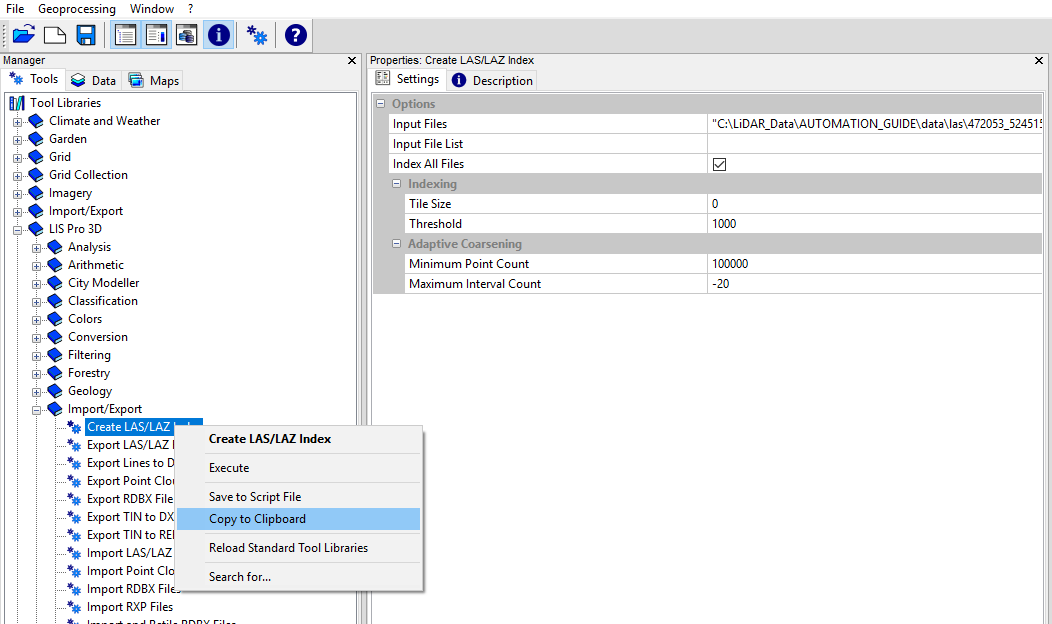
In the pop-up-window, choose Python Wrapper Call (all settings) in order to copy the python function of the Create LAS/LAZ Dataset - Tool to clipboard.
Step 24.2: Paste code from clipboard
Paste the code from clipboard into your 01_data_preparation.py python script. This code should look like this:
    from PySAGA.tools import lis_io
    lis_io.Create_LASLAZ_Index(FILES='"C:\LiDAR_Data\AUTOMATION_GUIDE\data\las\472053_5245153.laz" "C:\LiDAR_Data\AUTOMATION_GUIDE\data\las\472053_5245903.laz"', INPUT_FILE_LIST='', INDEX_ALL=True, TILE_SIZE=0.000000, THRESHOLD=1000, MIN_POINTS=100000, MAX_INTERVALS=-20)
Your total code in the script should look like this:
Take care that you put it at the right position (before stoptime).
import os
import project_config as cfg
from PySAGA import saga_api, lis_cmd


def Task(TaskNum=0):

    inputfiles = lis_cmd.Create_File_List(cfg.LASINDIR, '.las;.laz', cfg.LASINDIR + os.sep + 'lasvf_input_file_list.txt')

    from PySAGA.tools import lis_io
    lis_io.Create_LASLAZ_Index(FILES='"C:\LiDAR_Data\AUTOMATION_GUIDE\data\las\472053_5245153.laz" "C:\LiDAR_Data\AUTOMATION_GUIDE\data\las\472053_5245903.laz"', INPUT_FILE_LIST='', INDEX_ALL=True, TILE_SIZE=0.000000, THRESHOLD=1000, MIN_POINTS=100000, MAX_INTERVALS=-20)

    return True


# -----------------------------------------------------------------------------
# -----------------------------------------------------------------------------
# -----------------------------------------------------------------------------
# the main function
#
if __name__ == '__main__':
    # -----------------------------------------------------------------------------
    # start the logging

    starttime = lis_cmd.Start_Logging(False)

    # -----------------------------------------------------------------------------
    # call the processing function
    result = Task()

    if not result:
        lis_cmd.Error_Exit('Processing task failed', starttime)


    # -----------------------------------------------------------------------------
    # stop logging
    lis_cmd.Stop_Logging(starttime)
Step 24.3: Make modification on your template code
Step 24.3.1
The import (from PySAGA.tools import lis_io) should be moved to the top of our code, where all the other imports are done (but this is just a matter of taste)!
Step 24.3.2
You can see that the parameter “FILES” is already set to the two file paths of our two *.laz-files.
This is only the case, if you have already run the tool in the GUI or if you have loaded a Parameter file (*.sprm) with saved settings. This allows LIS Pro 3D to remember the used settings.
FILES='"C:\LiDAR_Data\AUTOMATION_GUIDE\data\las\472053_5245153.laz" "C:\LiDAR_Data\AUTOMATION_GUIDE\data\las\472053_5245903.laz"'Step 24.3.3
If you inspect our current script, you might recognize that we have already a function call in our script, resulting in a file list (also including both laz files), which is called inputfiles. inputfiles is a python variable pointing onto a file list.
inputfiles = lis_cmd_sapi.Create_File_List(cfg.LASINDIR, '.las;.laz', cfg.LASINDIR + os.sep + 'lasvf_input_file_list.txt')As inputfiles is a python variable, this allows us to pass this python variable to our tool. In order to make use of this file list, we change our code as follows (We want to use the INPUT_FILE_LIST instead of passing a bunch of files to FILES):
lis_io.Create_LASLAZ_Index(FILES='', INPUT_FILE_LIST=inputfiles, INDEX_ALL=True, TILE_SIZE=0.000000, THRESHOLD=1000, MIN_POINTS=100000, MAX_INTERVALS=-20)Now the code should look like this:
import os
import project_config as cfg
from PySAGA import saga_api, lis_cmd
from PySAGA.tools import lis_io


def Task(TaskNum=0):

    inputfiles = lis_cmd.Create_File_List(cfg.LASINDIR, '.las;.laz', cfg.LASINDIR + os.sep + 'lasvf_input_file_list.txt')


    lis_io.Create_LASLAZ_Index(FILES='', INPUT_FILE_LIST=inputfiles, INDEX_ALL=True, TILE_SIZE=0.000000, THRESHOLD=1000, MIN_POINTS=100000, MAX_INTERVALS=-20)

    return True


# -----------------------------------------------------------------------------
# -----------------------------------------------------------------------------
# -----------------------------------------------------------------------------
# the main function
#
if __name__ == '__main__':
    # -----------------------------------------------------------------------------
    # start the logging

    starttime = lis_cmd.Start_Logging(False)

    # -----------------------------------------------------------------------------
    # call the processing function
    result = Task()

    if not result:
        lis_cmd.Error_Exit('Processing task failed', starttime)


    # -----------------------------------------------------------------------------
    # stop logging
    lis_cmd.Stop_Logging(starttime)
Step 24.3.4
However, as a user we will have no idea if the tool within our script was executed successfully or if there was an error. This is of particular importance, if we have scripts processing thousands of files.
To get more control, we put the the tool run into an if-statement and check if it was really successful. If not, we print an error, the starttime of the tool run and return the function.
An if-statement starts with an if, followed by a condition (the function call in this case), and ending with a colon. The code block that has to be executed, if the statement is true, has to be indented!
Change the tool call to this:
    if not lis_io.Create_LASLAZ_Index(FILES='', INPUT_FILE_LIST=inputfiles, INDEX_ALL=True, TILE_SIZE=0.000000, THRESHOLD=1000, MIN_POINTS=100000, MAX_INTERVALS=-20):
return lis_cmd.Error_Return('Failed to execute tool')Note that in all the examples given in these tutorial, we never use the standard print() of python but special methods coming with LIS Pro 3D (lis_cmd). These methods help us organizing the different prints (errors and standard prints) and help us keeping these prints organized even if we run parallized processing with multiple processes running at the same time and producing prints at the same time.
### for a normal print to be used instead of print()
Message_Print(msg)

### a print indicating an error
Error_Print(msg):

### a print indicating an error and exiting the whole script
Error_Exit(msg, starttime, exitLogging=True):

### a print indicating an error and exiting a python function and not the whole script (exits a python function, if called within a python function)
Error_Return(msg):We put the tool call into an if-statement because the python function of the LASLAZ_Index tool returns a bool (True/False), indicating if the tool run was successful.
In the end, the final code should look like this and we have our first fully functional python script with one single LIS Pro 3D Tool call in it:
import os
import project_config as cfg
from PySAGA import saga_api, lis_cmd
from PySAGA.tools import lis_io


def Task(TaskNum=0):

    inputfiles = lis_cmd.Create_File_List(cfg.LASINDIR, '.las;.laz', cfg.LASINDIR + os.sep + 'lasvf_input_file_list.txt')


    if not lis_io.Create_LASLAZ_Index(FILES='', INPUT_FILE_LIST=inputfiles, INDEX_ALL=True, TILE_SIZE=0.000000, THRESHOLD=1000, MIN_POINTS=100000, MAX_INTERVALS=-20):
        return lis_cmd.Error_Return('Failed to execute tool')

    return True


# -----------------------------------------------------------------------------
# -----------------------------------------------------------------------------
# -----------------------------------------------------------------------------
# the main function
#
if __name__ == '__main__':
    # -----------------------------------------------------------------------------
    # start the logging

    starttime = lis_cmd.Start_Logging(False)

    # -----------------------------------------------------------------------------
    # call the processing function
    result = Task()

    if not result:
        lis_cmd.Error_Exit('Processing task failed', starttime)


    # -----------------------------------------------------------------------------
    # stop logging
lis_cmd.Stop_Logging(starttime)We will repeat the shown modifications 1, 2 and 4 for all the other tool calls
Step 25: Copy Code for Create-Virtual-LAS/LAZ-Dataset Tool
right-click onto the Create-Virtual-LAS/LAZ-Dataset Tool and copy the python code to clipboard.
This will lead to the following code:
from PySAGA.tools import lis_virtual
lis_virtual.Create_Virtual_LASLAZ_Dataset(FILES='"C:\LiDAR_Data\AUTOMATION_GUIDE\data\las\472053_5245153.laz" "C:\LiDAR_Data\AUTOMATION_GUIDE\data\las\472053_5245903.laz"', INPUT_FILE_LIST='', FILENAME='C:\LiDAR_Data\AUTOMATION_GUIDE\data\las\tiles.lasvf', METHOD_PATHS='relative', COLOR_DEPTH='16 bit')
25.1 Make modifications
Put the import from PySAGA.tools import lis_virtual the top of your script
Make the shown modifications so that your code looks like this:
if not lis_virtual.Create_Virtual_LASLAZ_Dataset(FILES='', INPUT_FILE_LIST=inputfiles, FILENAME='C:\LiDAR_Data\AUTOMATION_GUIDE\data\las\tiles.lasvf', METHOD_PATHS='relative', COLOR_DEPTH='16 bit'):
        return lis_cmd.Error_Return('Failed to execute tool')
Additionally, we want to define all our paths and filenames in the central configuration script (project_config.py). There, we have already defined the path where our lasvf file has to be saved.
LASVF = LASINDIR + os.sep + 'tiles.lasvf'We can use the variable LASVF from project_config.py by replacing
FILENAME='C:\LiDAR_Data\AUTOMATION_GUIDE\data\las\tiles.lasvf'with
FILENAME=cfg.LASVF25.2 The updated script
The updated script should look like this now and should include two tool calls (Create LAS/LAZ Index and Create Virtual LAS/LAZ Dataset)
import os
import project_config as cfg
from PySAGA import saga_api, lis_cmd
from PySAGA.tools import lis_io
from PySAGA.tools import lis_virtual


def Task(TaskNum=0):

    inputfiles = lis_cmd.Create_File_List(cfg.LASINDIR, '.las;.laz', cfg.LASINDIR + os.sep + 'lasvf_input_file_list.txt')


    if not lis_io.Create_LASLAZ_Index(FILES='', INPUT_FILE_LIST=inputfiles, INDEX_ALL=True, TILE_SIZE=0.000000, THRESHOLD=1000, MIN_POINTS=100000, MAX_INTERVALS=-20):
        return lis_cmd.Error_Return('Failed to execute tool')

    if not lis_virtual.Create_Virtual_LASLAZ_Dataset(FILES='', INPUT_FILE_LIST=inputfiles, FILENAME=cfg.LASVF,
                                                         METHOD_PATHS='relative', COLOR_DEPTH='16 bit'):
        return lis_cmd.Error_Return('Failed to execute tool')

    return True


# -----------------------------------------------------------------------------
# -----------------------------------------------------------------------------
# -----------------------------------------------------------------------------
# the main function
#
if __name__ == '__main__':
    # -----------------------------------------------------------------------------
    # start the logging

    starttime = lis_cmd.Start_Logging(False)

    # -----------------------------------------------------------------------------
    # call the processing function
    result = Task()

    if not result:
        lis_cmd.Error_Exit('Processing task failed', starttime)


    # -----------------------------------------------------------------------------
    # stop logging
    lis_cmd.Stop_Logging(starttime)
Step 26: Copy Code of Create-Tileshape-from-Virtual-LAS/LAZ Tool
Copy the python code of the Create-Tileshape-from-Virtual-LAS/LAZ tool call to clipboard
The python code looks like this:
from PySAGA.tools import lis_virtual

tile_shp = saga_api.SG_Get_Data_Manager().Add_Shapes() # output data object

lis_virtual.Create_Tileshape_from_Virtual_LASLAZ(TILE_SHP=tile_shp, FILENAME='D:\LiDAR_Data\AUTOMATION_GUIDE\data\las\tiles.lasvf')
In contrast to the previous tools, which read from an input path and write directly to an output path, this tool creates an output shapes object (“TILE_SHP”). For us as users this means, that we have to initialize the tileshape as an empty object, in order to pass it to the tool. After tool execution, the object is pointing onto the result shape file and we can call an explicit save command on this object later!
The initialization of the shapes object (coming from the copy to clipboard) looks like this:
tile_shp = saga_api.SG_Get_Data_Manager().Add_Shapes() # output data objectStep 26.1: Make modifications on your template code
Step 26.1.1
Delete the import from PySAGA.tools import lis_virtual, because we already have it at the top of our script.
Step 26.1.2
Put the call into an if-statement with an Error_Return() call!
Step 26.1.3
Again, we want to define all our paths and filenames in the central configuration script (project_config.py). There, we have already defined the path where our lasvf file is located.
LASVF = LASINDIR + os.sep + 'tiles.lasvf'We can use the variable LASVF from project_config.py by replacing
FILENAME='C:\LiDAR_Data\AUTOMATION_GUIDE\data\las\tiles.lasvf'with
FILENAME=cfg.LASVFStep 26.1.4
Rename the variable used to store the tileshape object, to make the name more specific:
Change from
tile_shp = saga_api.SG_Get_Data_Manager().Add_Shapes() # output data objectto
## we also change the variable name in order to see that it is a tileshape that we are initializing
tileshape_vf = saga_api.SG_Get_Data_Manager().Add_Shapes()
Note that saga_api.SG_Get_Data_Manager().Add_Shapes() not only initializes the output object, but also adds it to the data manager centrally organizing the used memory allocations. This will allow us to conveniently free memory ressources later by simply deleting all objects within the data manager in one go.
Paying attention to memory resources is a very important aspect when it comes to processing big data in repetitive operations!
Step 26.1.5
Add this object as an output to the tool call:
TILE_SHP=tileshape_vfThe modified code will look like this
    tileshape_vf = saga_api.SG_Get_Data_Manager().Add_Shapes()

    if not lis_virtual.Create_Tileshape_from_Virtual_LASLAZ(TILE_SHP=tileshape_vf, FILENAME=cfg.LASVF):
        return lis_cmd.Error_Return('Failed to execute tool')
Step 26.3: The updated script
The updated script should look like this now and should include three tool calls (Create LAS/LAZ Index, Create Virtual LAS/LAZ Dataset and Create Tileshape from Virtual LAS/LAZ)
import os
import project_config as cfg
from PySAGA import saga_api, lis_cmd
from PySAGA.tools import lis_io
from PySAGA.tools import lis_virtual


def Task(TaskNum=0):

    inputfiles = lis_cmd.Create_File_List(cfg.LASINDIR, '.las;.laz', cfg.LASINDIR + os.sep + 'lasvf_input_file_list.txt')


    if not lis_io.Create_LASLAZ_Index(FILES='', INPUT_FILE_LIST=inputfiles, INDEX_ALL=True, TILE_SIZE=0.000000, THRESHOLD=1000, MIN_POINTS=100000, MAX_INTERVALS=-20):
        return lis_cmd.Error_Return('Failed to execute tool')

    if not lis_virtual.Create_Virtual_LASLAZ_Dataset(FILES='', INPUT_FILE_LIST=inputfiles, FILENAME=cfg.LASVF,
                                                         METHOD_PATHS='relative', COLOR_DEPTH='16 bit'):
        return lis_cmd.Error_Return('Failed to execute tool')

    tileshape_vf = saga_api.SG_Get_Data_Manager().Add_Shapes()

    if not lis_virtual.Create_Tileshape_from_Virtual_LASLAZ(TILE_SHP=tileshape_vf, FILENAME=cfg.LASVF):
        return lis_cmd.Error_Return('Failed to execute tool')

    return True


# -----------------------------------------------------------------------------
# -----------------------------------------------------------------------------
# -----------------------------------------------------------------------------
# the main function
#
if __name__ == '__main__':
    # -----------------------------------------------------------------------------
    # start the logging

    starttime = lis_cmd.Start_Logging(False)

    # -----------------------------------------------------------------------------
    # call the processing function
    result = Task()

    if not result:
        lis_cmd.Error_Exit('Processing task failed', starttime)


    # -----------------------------------------------------------------------------
    # stop logging
    lis_cmd.Stop_Logging(starttime)
Step 27: Copy code of Create-Graticule-Tool
Copy the code of the Create-Graticule-Tool to clipboard
This code looks like this:
    from PySAGA.tools import shapes_tools

    extent = saga_api.SG_Get_Data_Manager().Add_Shapes('') # input data object
    graticule_rect = saga_api.SG_Get_Data_Manager().Add_Shapes() # output data object

    shapes_tools.Create_Graticule(EXTENT=extent, GRATICULE_RECT=graticule_rect, TYPE='Rectangles', DIVISION_X=100.000000, DIVISION_Y=100.000000, ALIGNMENT='bottom-left', ROUND=True)
Step 27.1: Make modifications on your template code
Step 27.1.1
According to the previous tool call, put the import to the top of the script and change to the following:
Step 27.1.2
Rename:
graticule_rect = saga_api.SG_Get_Data_Manager().Add_Shapes()to
tileshape_100 = saga_api.SG_Get_Data_Manager().Add_Shapes()Step 27.1.3
Pass the output tileshape_100 to the tool call (GRATICULE_RECT=tileshape_100)
Step 27.1.4
Note that we have the object tileshape_vf from the previous step that we can use as EXTENT (EXTENT=tileshape_vf)! Thus, we don’t need to initialize the object extent here!
Delete:
extent = saga_api.SG_Get_Data_Manager().Add_Shapes('') # input data objectAnd add EXTENT=tileshape_vf to the tool call!
Step 27.1.5
Save the output tileshape_100 to a filename that we have defined in the project_config.py
tileshape_100.Save(cfg.TILESHAPE_100)Step 28: Updated script
import os
import project_config as cfg
from PySAGA import saga_api, lis_cmd
from PySAGA.tools import lis_io
from PySAGA.tools import lis_virtual
from PySAGA.tools import shapes_tools


def Task(TaskNum=0):

    inputfiles = lis_cmd.Create_File_List(cfg.LASINDIR, '.las;.laz', cfg.LASINDIR + os.sep + 'lasvf_input_file_list.txt')


    if not lis_io.Create_LASLAZ_Index(FILES='', INPUT_FILE_LIST=inputfiles, INDEX_ALL=True, TILE_SIZE=0.000000, THRESHOLD=1000, MIN_POINTS=100000, MAX_INTERVALS=-20):
        return lis_cmd.Error_Return('Failed to execute tool')

    if not lis_virtual.Create_Virtual_LASLAZ_Dataset(FILES='', INPUT_FILE_LIST=inputfiles, FILENAME=cfg.LASVF,
                                                         METHOD_PATHS='relative', COLOR_DEPTH='16 bit'):
        return lis_cmd.Error_Return('Failed to execute tool')

    tileshape_vf = saga_api.SG_Get_Data_Manager().Add_Shapes()

    if not lis_virtual.Create_Tileshape_from_Virtual_LASLAZ(TILE_SHP=tileshape_vf, FILENAME=cfg.LASVF):
        return lis_cmd.Error_Return('Failed to execute tool')

    tileshape_100 = saga_api.SG_Get_Data_Manager().Add_Shapes()

    if not shapes_tools.Create_Graticule(EXTENT=tileshape_vf, GRATICULE_RECT=tileshape_100, TYPE='Rectangles',
                                             DIVISION_X=cfg.TILE_SIZE_PROCESSING, DIVISION_Y=cfg.TILE_SIZE_PROCESSING,
                                             ALIGNMENT='bottom-left', ROUND=True):
        return lis_cmd.Error_Return('Failed to execute tool')

    tileshape_100.Save(cfg.TILESHAPE_100)

    return True


# -----------------------------------------------------------------------------
# -----------------------------------------------------------------------------
# -----------------------------------------------------------------------------
# the main function
#
if __name__ == '__main__':
    # -----------------------------------------------------------------------------
    # start the logging

    starttime = lis_cmd.Start_Logging(False)

    # -----------------------------------------------------------------------------
    # call the processing function
    result = Task()

    if not result:
        lis_cmd.Error_Exit('Processing task failed', starttime)


    # -----------------------------------------------------------------------------
    # stop logging
    lis_cmd.Stop_Logging(starttime)
Step 29: create 300m and 500m tiling scheme for data processing
The 100m tiling scheme of the previous step is used to chunk the total data coverage down into tiles for data processing. Besides the 100m resolution scheme, we also need a 300m and a 500m resolution scheme.
In order to do so, you can simply copy paste the previous tool call and change:
DIVISION_X=100, DIVISION_Y=100to
DIVISION_X=300, DIVISION_Y=300and
DIVISION_X=200, DIVISION_Y=500Change also the variable name of the output shapes dataset and save it at the location predefined in the project_config.py script.
Step 30: Free memory ressources in one go
If all tasks are done, free memory ressources by deleting all objects from the data manager!
    # -----------------------------------------------------------------------------
    # free memory and stop logging
    saga_api.SG_Get_Data_Manager().Delete()
The final code should look like this:
import os
import project_config as cfg
from PySAGA import saga_api, lis_cmd
from PySAGA.tools import lis_io
from PySAGA.tools import lis_virtual
from PySAGA.tools import shapes_tools
def Task(TaskNum=0):
# -----------------------------------------------------------------------------
# create a list of all LAS/LAZ input files in the data folder
inputfiles = lis_cmd.Create_File_List(cfg.LASINDIR, '.las;.laz', cfg.LASINDIR + os.sep + 'lasvf_input_file_list.txt')
# -----------------------------------------------------------------------------
# create a spatial index for all LAS/LAZ files
if not lis_io.Create_LASLAZ_Index(FILES='', INPUT_FILE_LIST=inputfiles, INDEX_ALL=True, TILE_SIZE=0.000000, THRESHOLD=1000, MIN_POINTS=100000, MAX_INTERVALS=-20):
return lis_cmd.Error_Return('Failed to execute tool')
# -----------------------------------------------------------------------------
# create a virtual point cloud dataset from the LAS/LAZ files
if not lis_virtual.Create_Virtual_LASLAZ_Dataset(FILES='', INPUT_FILE_LIST=inputfiles, FILENAME=cfg.LASVF,
METHOD_PATHS='relative', COLOR_DEPTH='16 bit'):
return lis_cmd.Error_Return('Failed to execute tool')
# -----------------------------------------------------------------------------
# create a tileshape of the virtual point cloud dataset
tileshape_vf = saga_api.SG_Get_Data_Manager().Add_Shapes()
if not lis_virtual.Create_Tileshape_from_Virtual_LASLAZ(TILE_SHP=tileshape_vf, FILENAME=cfg.LASVF):
return lis_cmd.Error_Return('Failed to execute tool')
# -----------------------------------------------------------------------------
# create a (small) tiling scheme and its polygon shapefile for data processing
tileshape_100 = saga_api.SG_Get_Data_Manager().Add_Shapes()
if not shapes_tools.Create_Graticule(EXTENT=tileshape_vf, GRATICULE_RECT=tileshape_100, TYPE='Rectangles',
DIVISION_X=cfg.TILE_SIZE_PROCESSING, DIVISION_Y=cfg.TILE_SIZE_PROCESSING,
ALIGNMENT='bottom-left', ROUND=True):
return lis_cmd.Error_Return('Failed to execute tool')
tileshape_100.Save(cfg.TILESHAPE_100)
# -----------------------------------------------------------------------------
# create a (larger) tiling scheme and its polygon shapefile for data export
tileshape_300 = saga_api.SG_Get_Data_Manager().Add_Shapes()
if not shapes_tools.Create_Graticule(EXTENT=tileshape_vf, GRATICULE_RECT=tileshape_300, TYPE='Rectangles',
DIVISION_X=cfg.TILE_SIZE_DELIVERY, DIVISION_Y=cfg.TILE_SIZE_DELIVERY,
ALIGNMENT='bottom-left', ROUND=True):
return lis_cmd.Error_Return('Failed to execute tool')
tileshape_300.Save(cfg.TILESHAPE_300)
# -----------------------------------------------------------------------------
# create one (large) single tile for data export
tileshape_500 = saga_api.SG_Get_Data_Manager().Add_Shapes()
if not shapes_tools.Create_Graticule(EXTENT=tileshape_vf, GRATICULE_RECT=tileshape_500, TYPE='Rectangles',
DIVISION_X=200, DIVISION_Y=500,
ALIGNMENT='bottom-left', ROUND=True):
return lis_cmd.Error_Return('Failed to execute tool')
tileshape_500.Save(cfg.TILESHAPE_500)
return True
# -----------------------------------------------------------------------------
# -----------------------------------------------------------------------------
# -----------------------------------------------------------------------------
# the main function
#
if __name__ == '__main__':
# -----------------------------------------------------------------------------
# start the logging
starttime = lis_cmd.Start_Logging(False)
# -----------------------------------------------------------------------------
# call the processing function
result = Task()
if not result:
lis_cmd.Error_Exit('Processing task failed', starttime)
# -----------------------------------------------------------------------------
# stop logging
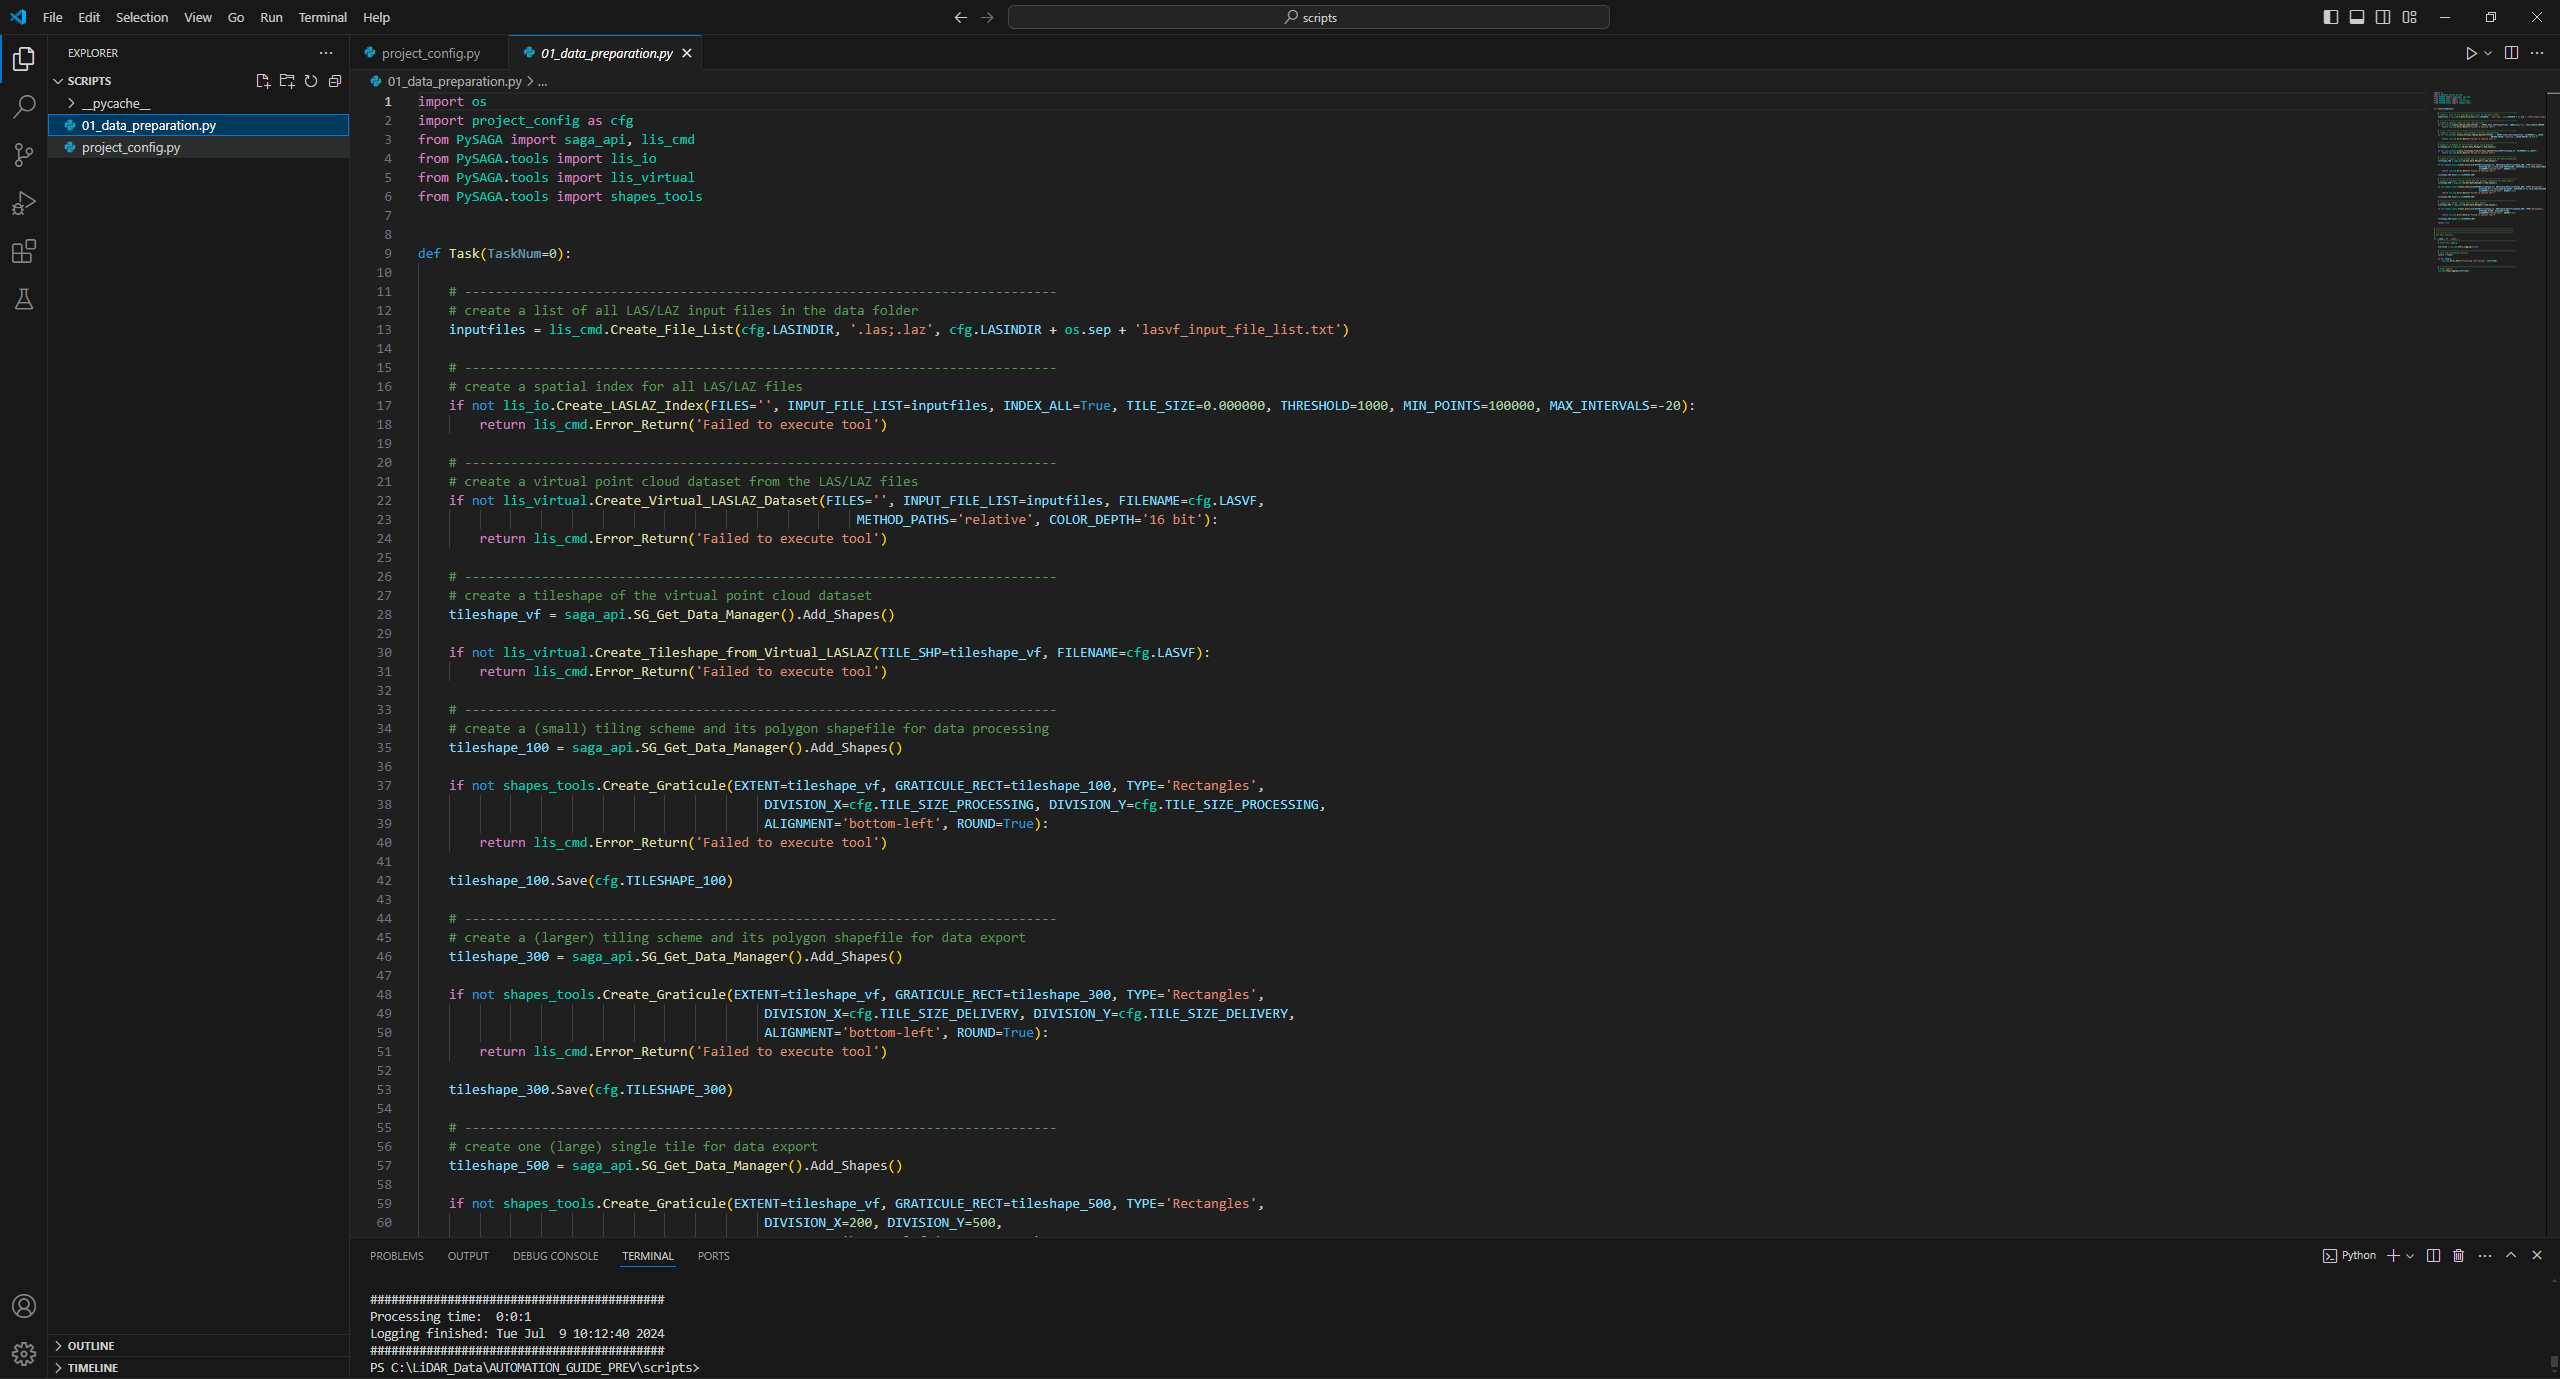
lis_cmd.Stop_Logging(starttime)Now we are done with the implementation of the script. We can run it by selecting the script and simply clicking on the play/run button in the upper-right corner of Visual Studio Code
In the TERMINAL Window at the bottom of Visual Studio Code we can see if everything worked.
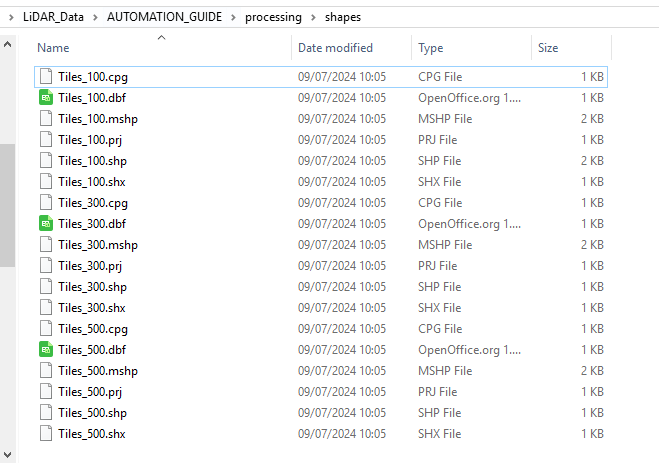
In the shapes folder of your project, you can see the output shapefiles now.
Step 31: Conclusion
In this tutorial you have learned how to design a data preparation workflow in the GUI of LIS Pro 3D and how to convert this into python code. The most convenient way of doing this is the copy to clipboard feature, available for every tool in the GUI.
In order to keep our code structured, we have our file pathes, filenames and settings in a separate configuration script called project_config.py.
The 01_data_preparation.py script is importing the project_config.py and uses the provided settings.
In the next tutorial, we will exploit this strategy in order to design a processing workflow. The processing workflow will use the datasets prepared within this tutorial.